Deploy Production-Ready Apps on Amazon ECS: A Complete Guide
Amazon Elastic Container Service is AWS' native container orchestration service. It is a fully managed service that enables the easy deployment, scaling and management of containerized applications.
ECS Basic Concepts
When working with Amazon ECS, there are a handful of concepts that you must understand in order to get the full picture. A thorough understanding of these concepts is the first step to becoming adept with AWS ECS.
ECS Capacity
ECS Cluster
ECS Task definition
ECS Task
ECS Service
ECS Namespace
ECS Controller
ECS Agent
Now let us explore these concepts one after the other.
- ECS Capacity: ECS capacity refers to the infrastructure on which your containers run. ECS Capacity can be one of the following options:
EC2 instances.
AWS fargate (serverless).
On-premises virtual machines (ECS anywhere).
Similar to ECS capacity is the capacity provier. Amazon ECS cluster capacity providers determine the infrastructure to use for your tasks. Each cluster has one or more capacity providers and an optional default capacity provider strategy. The capacity provider strategy determines how the tasks are spread across the capacity providers.
- ECS Cluster: The ECS Cluster is a logical grouping of conatiner instances on which the conatainerised applications run. A Cluster can be in one of the following states; ACTIVE, PROVISIONING, DEPROVISIONING, FAILED, INACTIVE.
- ECS Task definition: A task definition is the blueprint for your application. It is a text file, in JSON format, that describes one or more containers, up to a maximum of ten, that form your application. Here is a sample below:
{
    "family": "webserver",
    "containerDefinitions": [
        {
            "name": "web",
            "image": "nginx",
            "memory": "100",
            "cpu": "99"
        }
    ],
    "requiresCompatibilities": [
        "FARGATE"
    ],
    "networkMode": "awsvpc",
    "memory": "512",
    "cpu": "256"
}
In many ways it is akin to a docker compose file. Your ECS task definition should contain the following parameters: The launch type, docker image, CPU and memory requirements, operating system of the container instance, docker networking mode, logging configuration, etc.
- ECS Task: An ECS task is an instantiation of a task definition. In other words, it is a running instance of a given task definition. An Elastic Container Service Task consumes resources to run containers based on the configuration in a task definition. Tasks may or may not be long-lived, and expose several attributes to help you monitor their state.
A task can either be in a stopped, active or runnng state.
- ECS Service: A service is a grouping of long-running tasks that share the same task definition. You can use an Amazon ECS service to run and maintain a specified number of instances of a task definition simultaneously in an Amazon ECS cluster. If one of your tasks fails or stops, the Amazon ECS service scheduler launches another instance of your task definition to replace it. This helps maintain your desired number of tasks in the service.
A Service is used to guarantee that you always have some number of Tasks running at all times.
In addition to maintaining the desired count of tasks in your service, you can optionally run your service behind a load balancer. The load balancer distributes traffic across the tasks that are associated with the service.
The image below presents an apt illustration of ECS services and how they fit into the ECS ecosystem.

- ECS Namespace: A namespace represents a way to structure your services and can span across multiple ECS clusters residing in different VPCs. All ECS services that belong to a specific namespace can communicate with existing services in the namespaces, provided there is existing network-level connectivity. Namespaces are necessary in Amazon ECS to use the ECS Service Connect or ECS service discovery features. Amazon ECS requests namespaces from AWS Cloud Map and then displays your namespaces in the AWS Management Console.
-- ECS Service Connect: Service Connect allows you to reference and connect services by logical name using the namespace provided by AWS Cloud Map for communication between ECS tasks, and automatically distributes traffic between ECS tasks without introducing or configuring a load balancer.
In other words, it is a function that allows Service Connect to allocate a private host name to tasks and allow the tasks to communicate with each other using that name.
- ECS Service Discovery: Service Discovery makes it possible for an ECS service to automatically register itself with a predictable and friendly DNS name in Amazon Route 53. As your services scale up or down in response to load or container health, the Route 53 hosted zone is kept up to date, allowing other services to lookup where they need to make connections based on the state of each service.
- ECS Controller: The ECS Controller is the software that manages your applications.
- ECS Agent: The Amazon ECS Container Agent is a component of Amazon Elastic Container Service (Amazon ECS) and is responsible for managing containers on behalf of Amazon ECS.
N.B: This GitHub repository contains code that allows you to automatically provision the following infrastructure using Terraform.
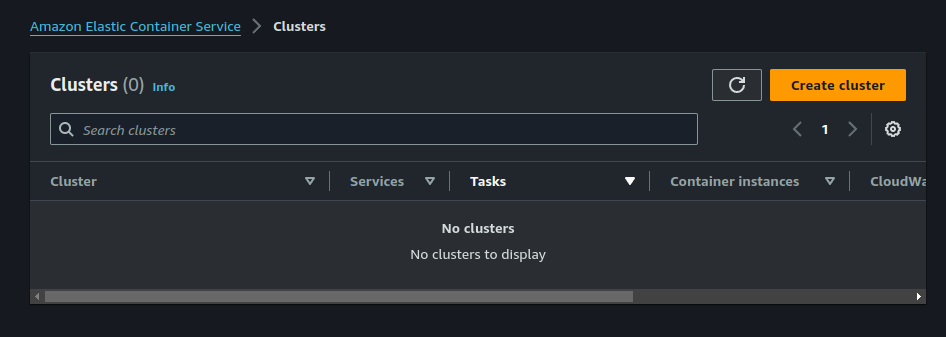
Step 1: Create An ECS Cluster
On the ECS console, click on "Create cluster"
Assign a name to your cluster. Notice also that we are only using ECS Fargate for this deployment.
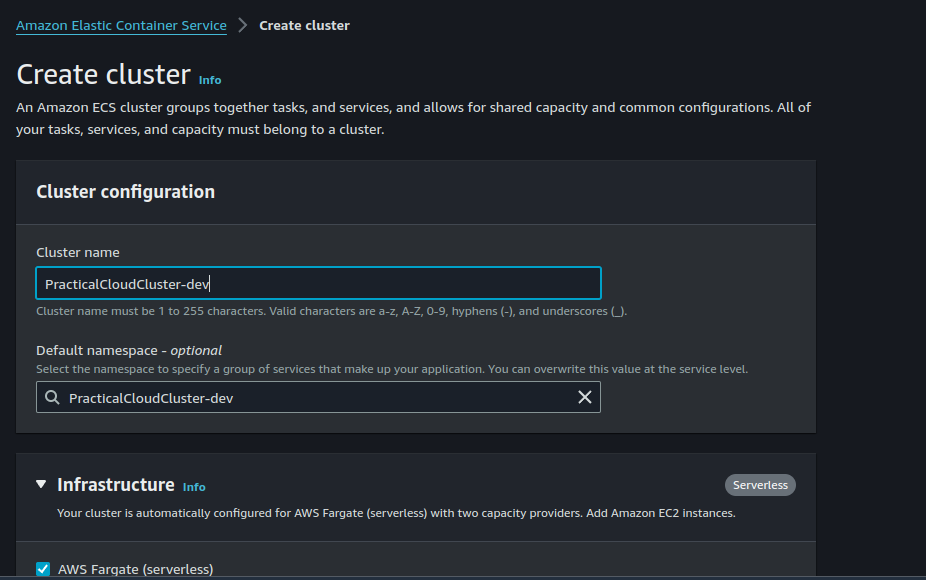
Be sure to enable container insights. This allows Cloudwatch to gather diagnostic insights about our containers. Click on "Create". ECS will invoke CloudFormation to provision our cluster.

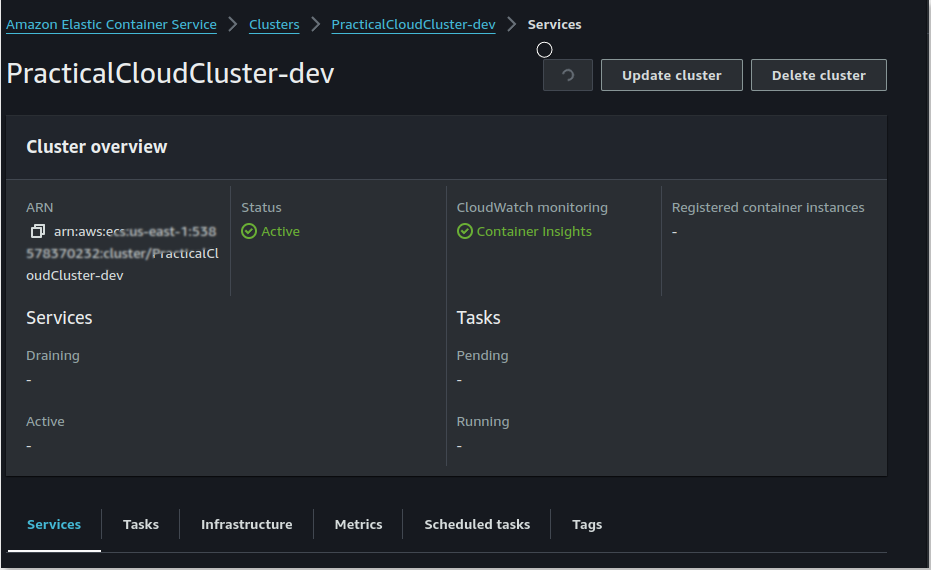
My Cluster has just been created.
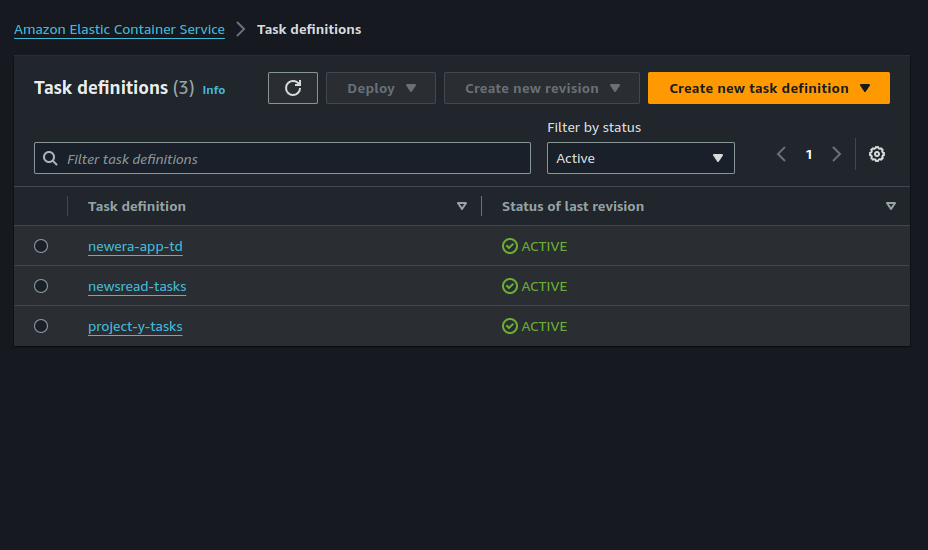
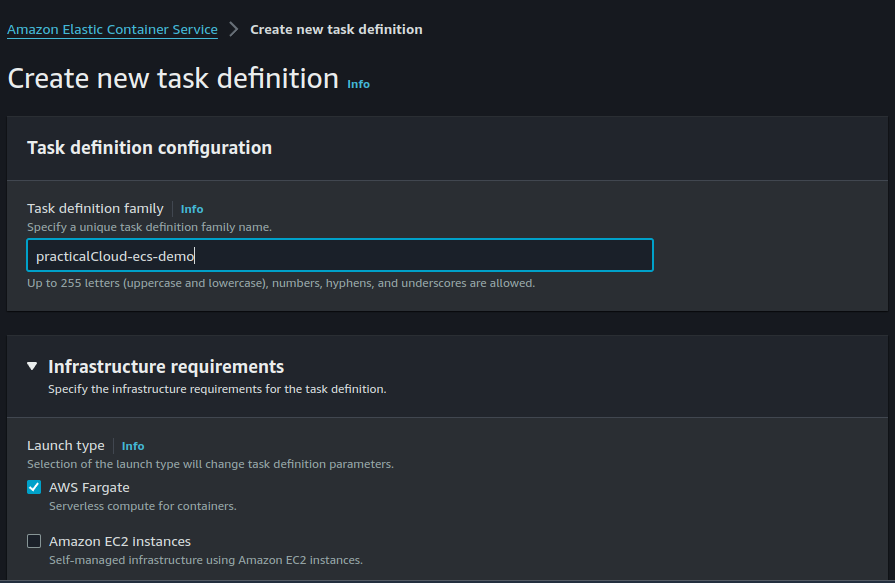
Step 2: Create A task Definition
Go to the task definitions page and click on "create new task definition".
Assign a name to your task definition faamily.
Here I am choosing my task size and also telling AWS to create a new task role for me.

Our application will be needing two containers. The logic container and the database container. For the first container (logic), give your container a name and select kelvinskell/terra-tier-ecs as the image uri. Our logic container is a flask application which listens on port 5000.
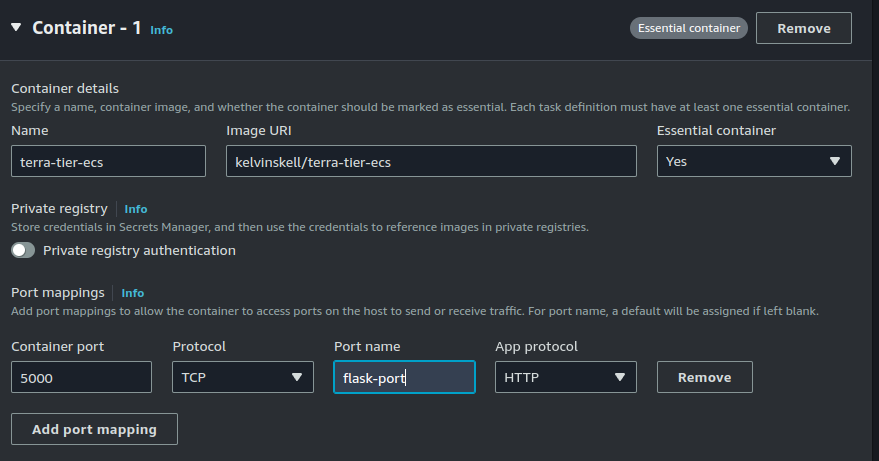
Add the following key-value pairs as your environmental variables.
SECRET_KEY=08dae760c2488d8a0dca1bfb
API_KEY=f39307bb61fb31ea2c458479762b9acc
MYSQL_DB=yourdbname
MYSQL_USER=yourusername
DATABASE_PASSWORD=Yourpassword@123
MYSQL_HOST=db
MYSQL_ROOT_PASSWORD=yourrootpassword
You can also decide to save this into a file, store it in Amazon S3 and provide the full object key of your envfile.
Fill in the following details for the database container.
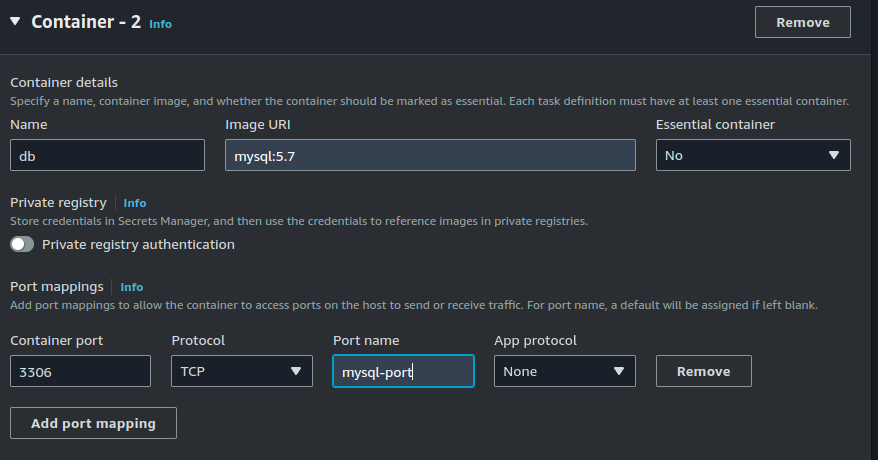
Assign root password as environmental variable.

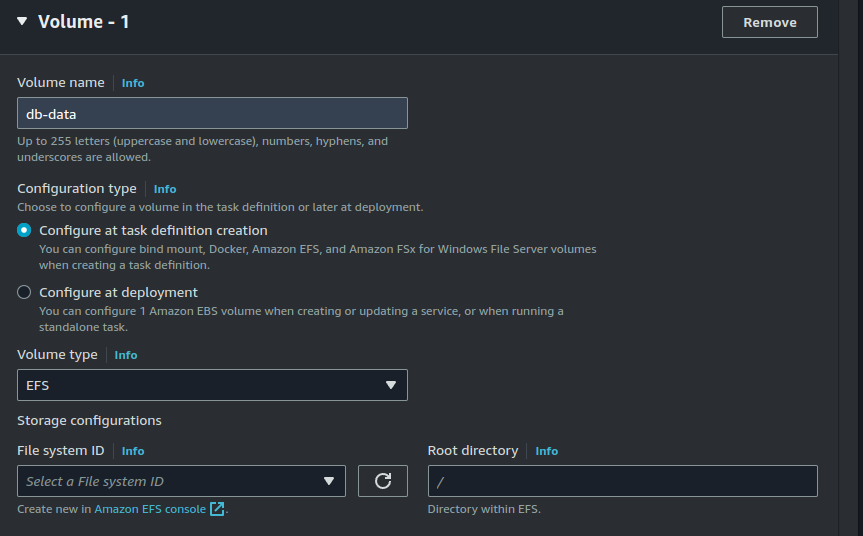
Since container2 is a database container, it needs a volume in order to persist it's data. We will be adding storage for this container.
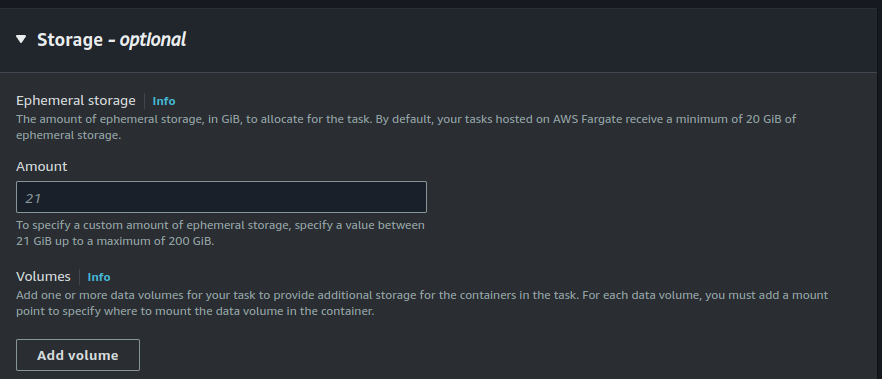
Since we are using EFS as our volume type, we will have to create an elastic filesystem.
Open up the vpc console and click on security group. Create a security group that (for now) allows inbound traffic on port 2049 (NFS port).
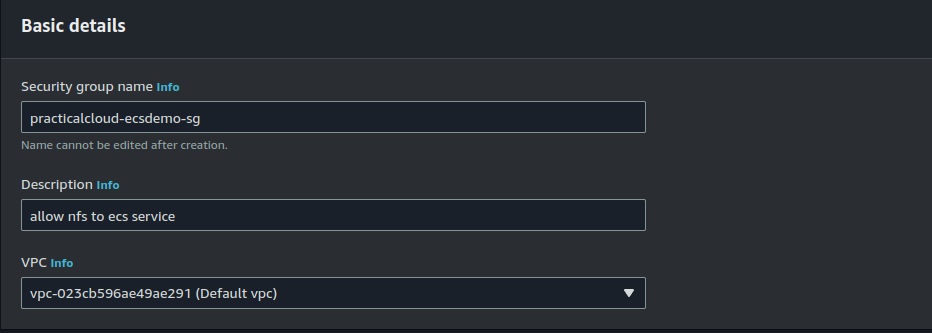
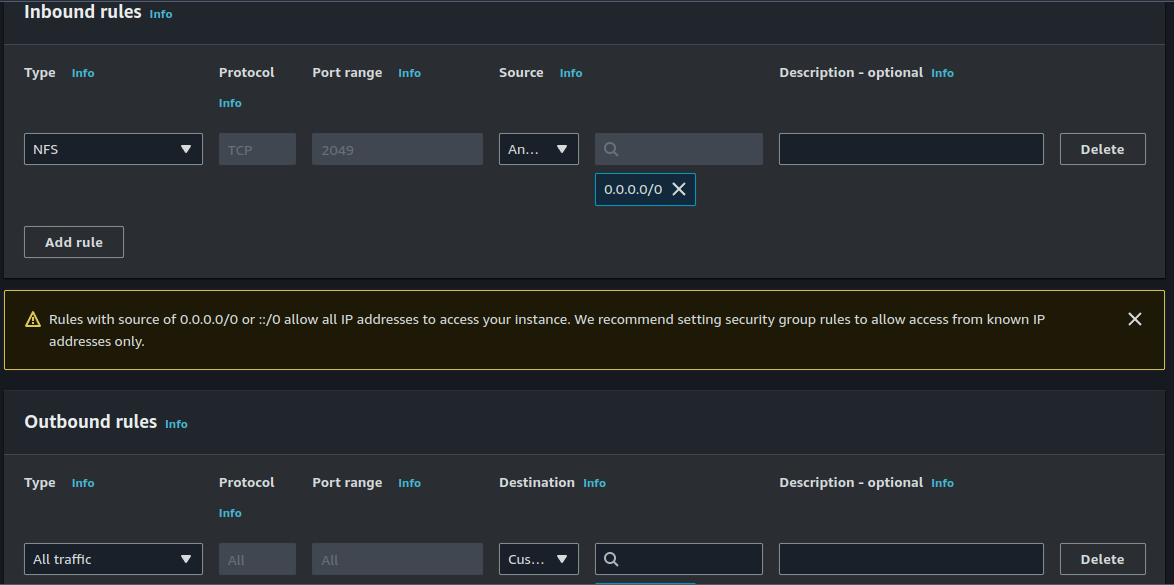
We wil be attaching this security group to our filesystems.
Click on "Amazon EFS console" and open it in a new tab.
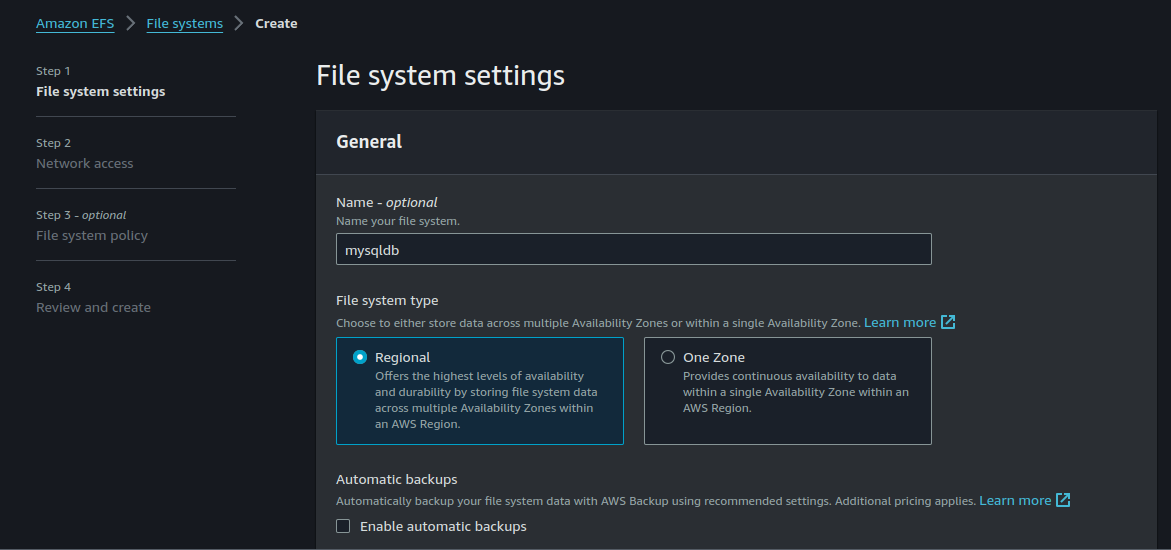
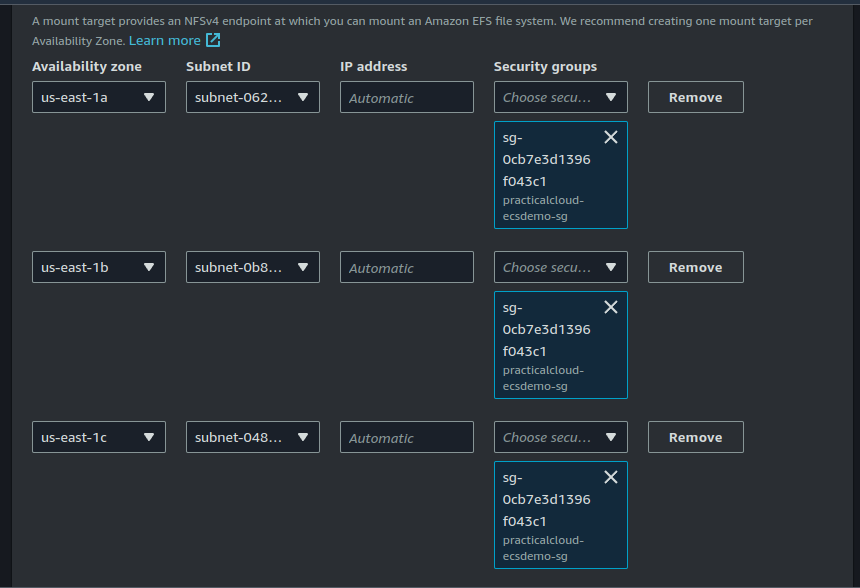
Notice above that I removed the default security group and attached the new security group we just created. Also we are using public subnets for this demonstration. For production scenarios, be sure to use private subnets.
Click on Next and "create filesystem".
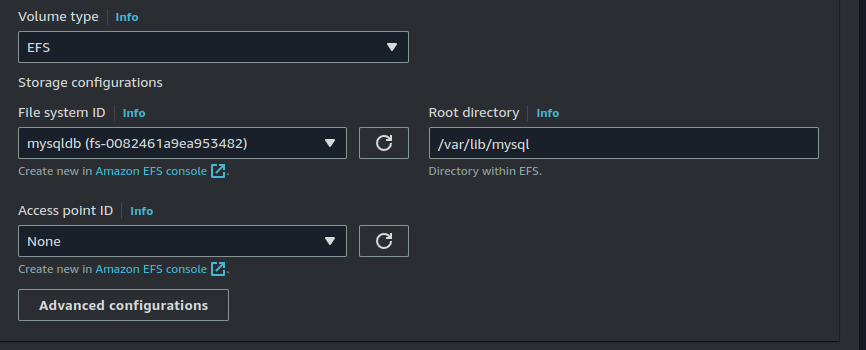
Back in the ECS console, I am going to attach the volume we just created and mount it inside the container at /var/lib/mysql.
Click on Create.
Step 3: Create an ECS Service
A service is a logical grouping of tasks that share the same task definition.
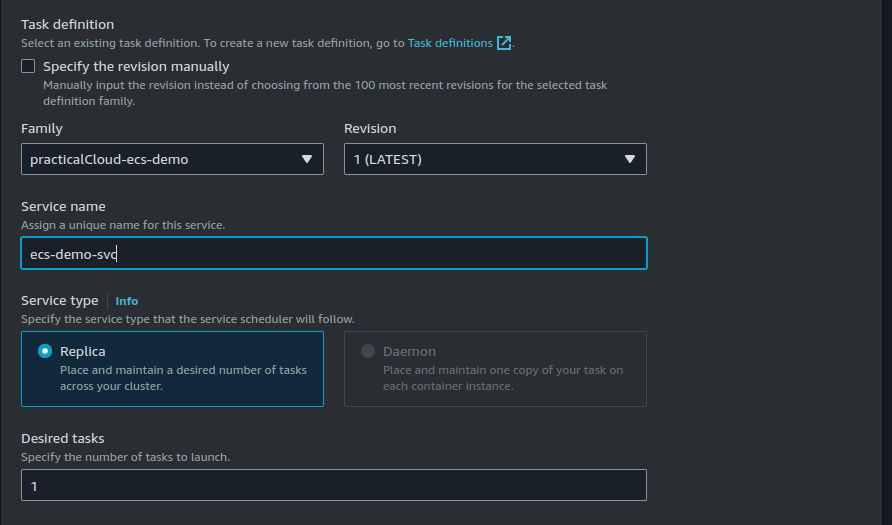
Go to the cluster that we just created and click on create service.
Select the task definition we just created and assign a name to your service. We are setting our desired tasks to one.
Under the Networking section, select your vpc and availaibility zones. I am restricting my availability zones to just 3 - same zones in which my efs mount point were created. We are also using public subnets since our EFS volumes were created in the same public subnets.
Again, In a production scenario, use private subnets. The terraform code in our repository adheres to this as it was written to mirror production use cases.
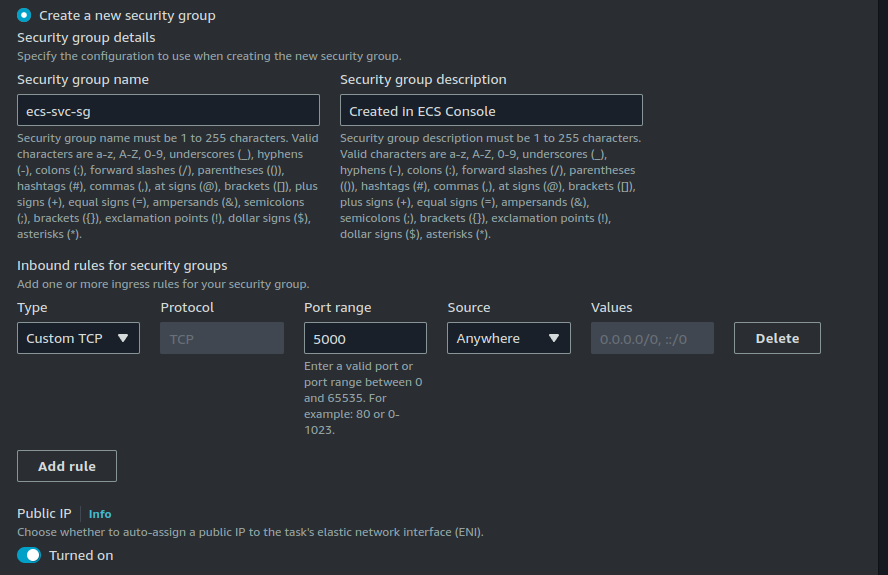
We are also creating a security group which will be attached to our service. This security group allows inbound traffic on port 5000 (Flask port).
we are also creating a load balancer. Load balancer are important for providing a stable endpoint for accessing our application. Also, the load balancer balances traffic accross our ECS tasks when we scale them up to more than 1.
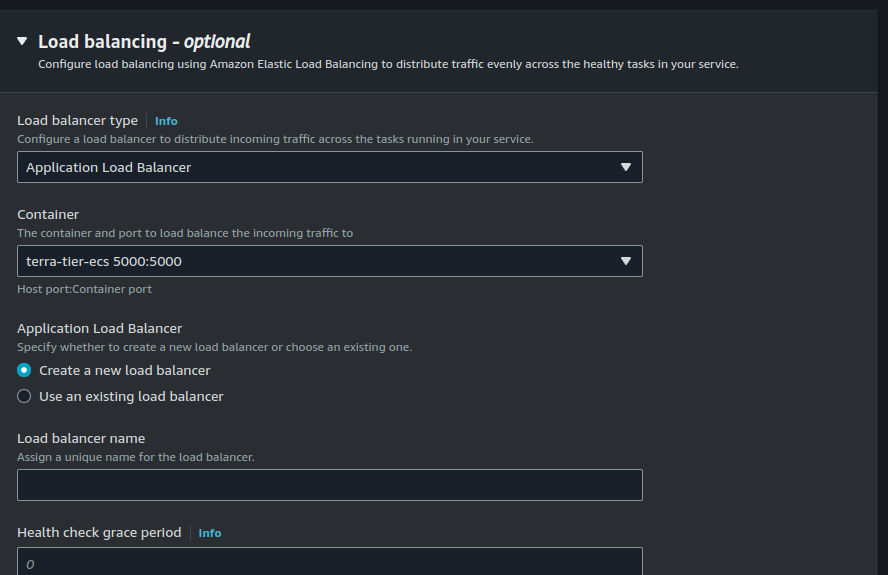
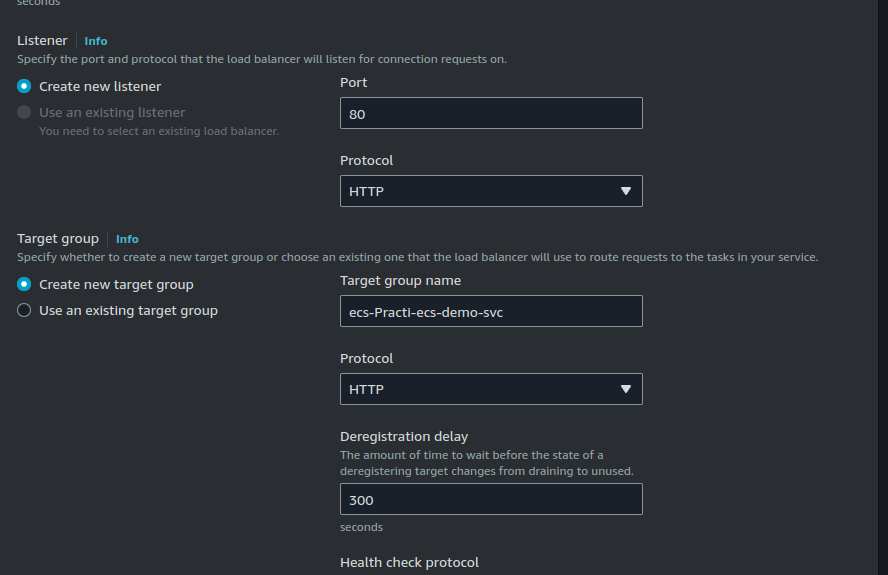
The load balancer will listen for HTTP traffic on port 80 and reroute to our target group on port 5000.
Click on Create.
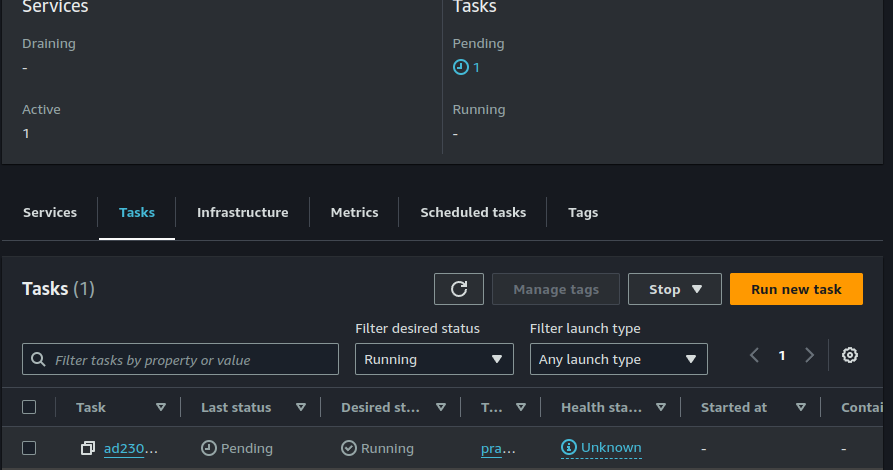
After some time, you should see tasks getting provisioned on the cluster.
Step 4: Accessing The Application
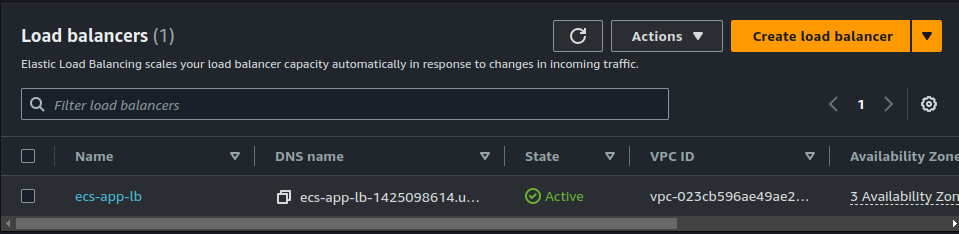
On the EC2 Console, go to the load balancer tab and copy your load balancer IP address.
When you paste this into a browser, you should be able to access the flask application.
Final words.
If you followed all the steps correctly, you should be able to access your application. But if this is not the case for you, simply use the Terraform code in this GitHub Repository to automate and provision the application.
You can then compare and contrast to see where you went wrong.
Happy Clouding !!!
Did you like this post?
If you did, please buy me coffee 😊