A Practical Guide to Building a Real-Time Chat Application on AWS Using API Gateway and Serverless Architecture
In today's digital age, real-time communication has become essential for businesses to provide immediate support and enhance customer engagement. Building a robust, scalable, and cost-effective chat application can be a complex task, but with AWS's powerful services, it becomes significantly more manageable. This lab will guide you through the process of creating a real-time single-page chat application using AWS API Gateway, AWS Lambda, and DynamoDB. This architecture leverages the benefits of serverless computing, ensuring your application scales automatically with demand and minimizes operational overhead.
Building A Real-Time Customer Support Chat Application on AWS
Overview of the Project
In this tutorial, we will build a real-time chat application for a "fictional" company named Practical Cloud. The application will allow customers to communicate with support agents in real-time. We will use AWS services to handle WebSocket connections, process messages, and manage connection states.
Here's a high-level overview of the components and their roles:
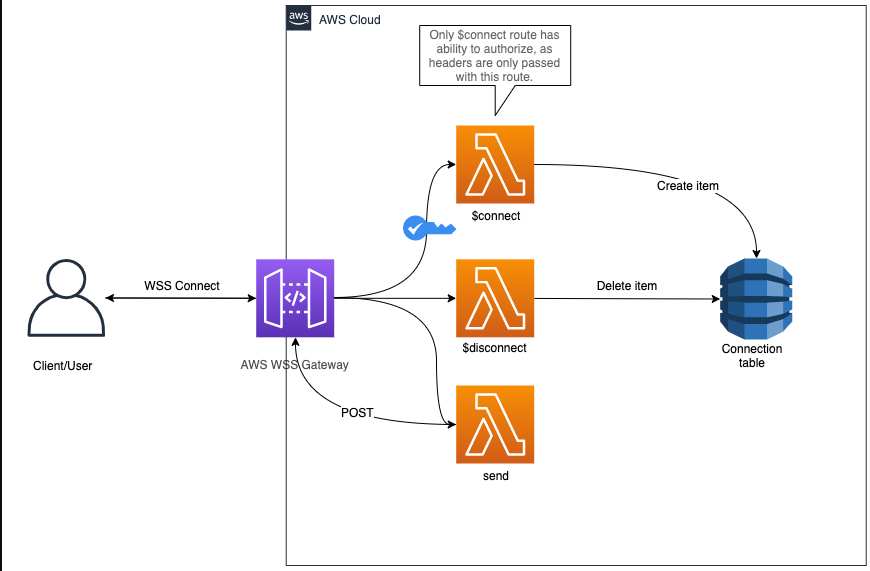
Architecture Components:
- API Gateway WebSocket:
- Role: Establishes and manages WebSocket connections between clients and the server.
- Functionality: Provides real-time, two-way communication between the user's browser and AWS Lambda functions.
- AWS Lambda:
- Role: Executes backend logic in response to WebSocket events.
- Functionality:
- Connection Handler: Manages new WebSocket connections and stores connection IDs in DynamoDB.
- Message Handler: Processes incoming messages, broadcasts them to all connected clients, and optionally stores chat history.
- Disconnection Handler: Removes disconnected clients from DynamoDB.
- DynamoDB:
- Role: Stores connection information and optionally chat history.
- Functionality: Provides a scalable and durable storage solution for maintaining the state of WebSocket connections and chat logs.
- SNS: Sends notifications to support agents for new messages.
- Cognito: Manages user authentication.
- React Front-End:
- Role: Provides the user interface for the chat application.
- Functionality: Establishes WebSocket connections to the API Gateway, sends messages, and displays incoming messages in real-time.
Benefits of a Customer Support Chat System
- Real-Time Interaction:
- Enables immediate assistance to customers, improving satisfaction and problem resolution times.
- Scalability:
- Serverless architecture automatically scales with the number of users, ensuring a smooth experience during peak times without manual intervention. We can easily manage concurrency and throttling in lambda functions.
- Cost Efficiency:
- Pay-per-use pricing model of AWS services ensures that costs are kept in check, especially beneficial for businesses with variable traffic.
- Low Maintenance:
- Serverless setup reduces the need for infrastructure management, allowing the support team to focus more on customer interaction rather than technical upkeep.
- Flexibility:
- Easily integrate with other AWS services for additional features like analytics, machine learning for sentiment analysis, and more.
Implementation Overview
- User Interface:
- Develop a Single Page Application (SPA) using frameworks like React, Angular, or Vue.js for a dynamic and responsive chat interface.
- WebSocket Connection:
- Use API Gateway to manage WebSocket connections, enabling real-time, two-way communication between clients and the server.
- Lambda Functions:
- Create Lambda functions for handling connection, disconnection, and message events:
- Connection Handler: Adds new users to DynamoDB when they initiate a chat.
- Message Handler: Processes and broadcasts messages to all connected users, logs chat history in DynamoDB.
- Disconnection Handler: Removes users from DynamoDB when they end the chat session.
- Create Lambda functions for handling connection, disconnection, and message events:
- Data Storage:
- Use DynamoDB to store active connections and chat history. This allows support agents to see previous conversations, providing context and continuity.
- User Authentication:
- Integrate with AWS Cognito for user authentication, ensuring secure and personalized chat sessions.
- Notifications and Alerts:
- Implement push notifications using AWS SNS to alert support agents of new incoming chats, ensuring timely responses.
- Analytics and Monitoring:
- Utilize AWS CloudWatch to monitor the performance and usage metrics of the chat system, helping to identify areas for improvement and ensuring reliability.
Additional Features
- Chat Transcripts:
- Provide users and support agents with downloadable chat transcripts for reference.
- Bot Integration:
- Integrate with AI-powered chatbots using AWS Lex to handle common queries, freeing up human agents for more complex issues.
- Multilingual Support:
- Leverage AWS Translate to offer real-time translation services, making support accessible to a global audience.
- Sentiment Analysis:
- Use AWS Comprehend to analyze the sentiment of customer messages, allowing support agents to prioritize and respond more effectively.
N.B: We will not be implementing these additional steps in this project.
This Customer Support Chat System not only demonstrates the capabilities of a serverless architecture on AWS but also addresses a real-world need, providing immediate and scalable support to customers.
By the end of this tutorial, you will have a fully functional real-time chat application that leverages AWS's serverless architecture for scalability, reliability, and cost efficiency. Let's dive into the step-by-step process of building this application.
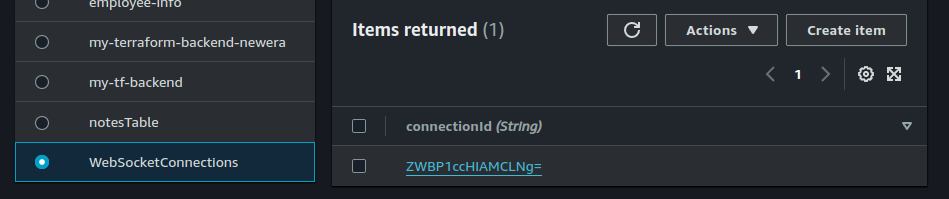
Step 1: Create the DynamoDB Table
- Create a DynamoDB table named
WebSocketConnectionswith a primary keyconnectionId(String).
aws dynamodb create-table \
    --table-name WebSocketConnections \
    --attribute-definitions \
        AttributeName=connectionId,AttributeType=S \
    --key-schema \
        AttributeName=connectionId,KeyType=HASH \
    --provisioned-throughput \
        ReadCapacityUnits=5,WriteCapacityUnits=5
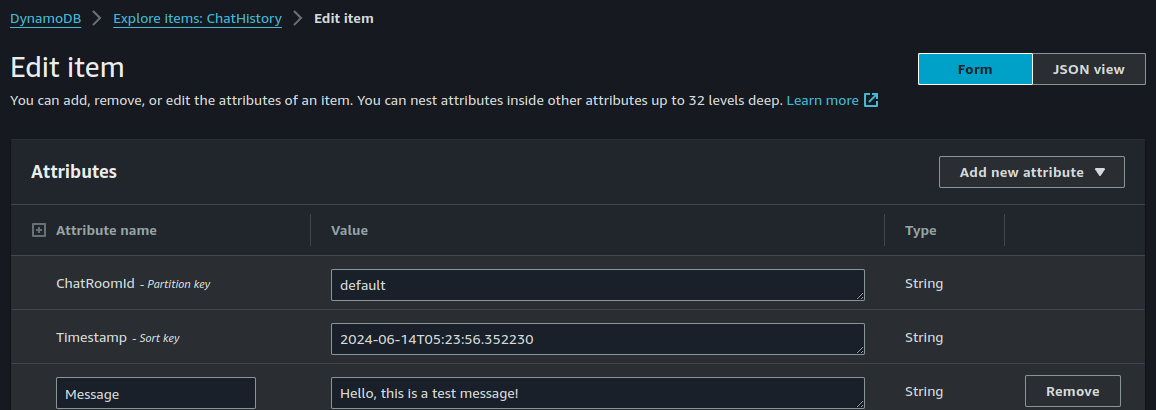
- Create a DynamoDB table named
ChatHistorywith a primary key ofChatRoomId.
aws dynamodb create-table \
    --table-name ChatHistory \
    --attribute-definitions \
        AttributeName=ChatRoomId,AttributeType=S \
        AttributeName=Timestamp,AttributeType=S \
    --key-schema \
        AttributeName=ChatRoomId,KeyType=HASH \
        AttributeName=Timestamp,KeyType=RANGE \
    --provisioned-throughput \
        ReadCapacityUnits=5,WriteCapacityUnits=5
Step 2: Create an SNS Topic
The SNS topic in this architecture is used to send notifications to support agents whenever a new chat message is received, ensuring they are alerted promptly for timely responses.
aws sns create-topic --name NewChatMessagesStep 3: Develop the Lambda Functions
3.1: Connection handler:
The connection_handler function is responsible for managing new WebSocket connections. When a client establishes a connection to the WebSocket API, this function is triggered. pecifically, it:
- Registers the new connection by storing the connection ID in a DynamoDB table.
- Ensures that the server can keep track of all active connections.
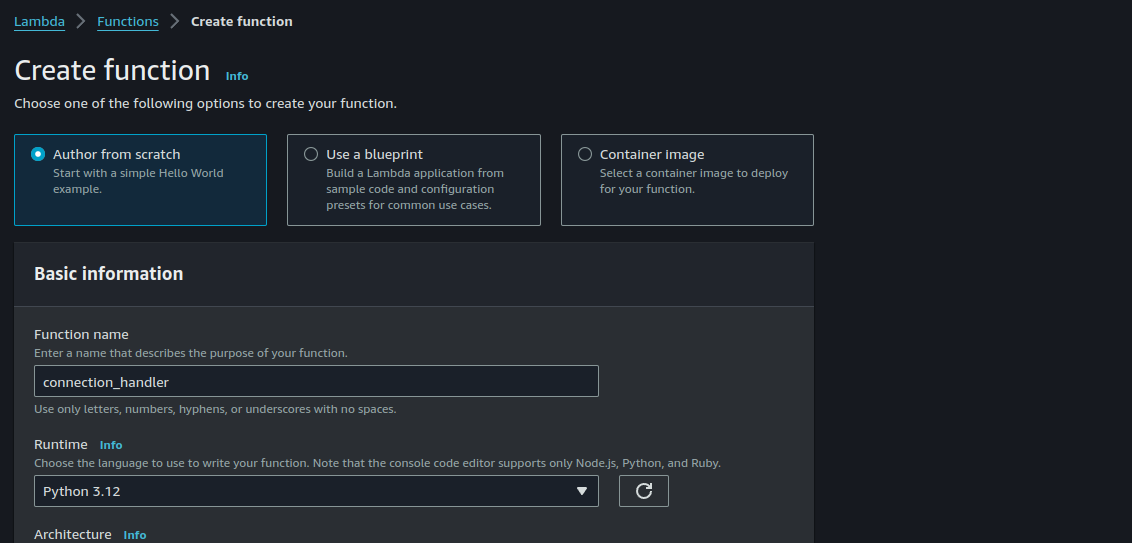
On the Lambda console, click on "Create Function" > "Authour from scartch" > "Python 3.12"
Enter the following code:
connection_handler:
import boto3
import os

dynamodb = boto3.resource('dynamodb')
table = dynamodb.Table(os.environ['TABLE_NAME'])

def lambda_handler(event, context):
    connection_id = event['requestContext']['connectionId']
    table.put_item(Item={'connectionId': connection_id})
    return {'statusCode': 200}
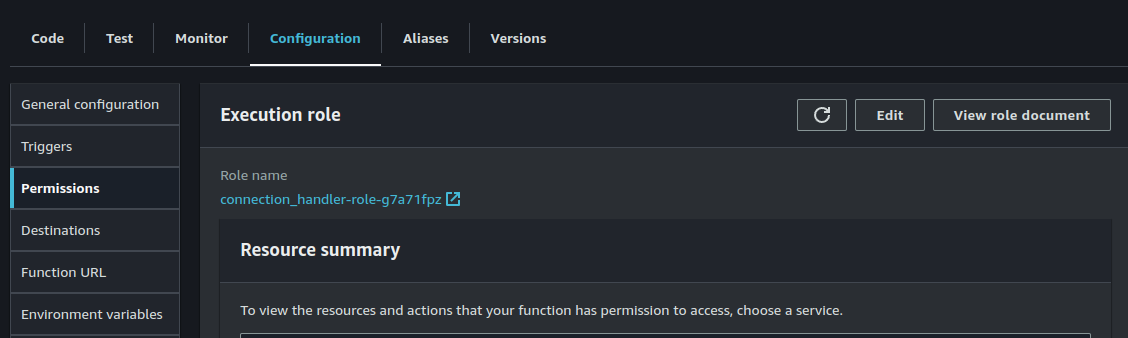
Update the permission to be able to put items into dynamodb table.
Click on "Configuration" > "Permissions". Click on the role > "Add permissions" > "Create inline policy".
Add the following policy:
{
	"Version": "2012-10-17",
	"Statement": [
		{
			"Sid": "Statement1",
			"Effect": "Allow",
			"Action": [
				"DynamoDB:PutItem"
			],
			"Resource": [
				"arn:aws:dynamodb:us-east-1:123456789102:table/WebSocketConnections"
			]
		}
	]
}
Replace "region" and "accountid" values as appropriate.
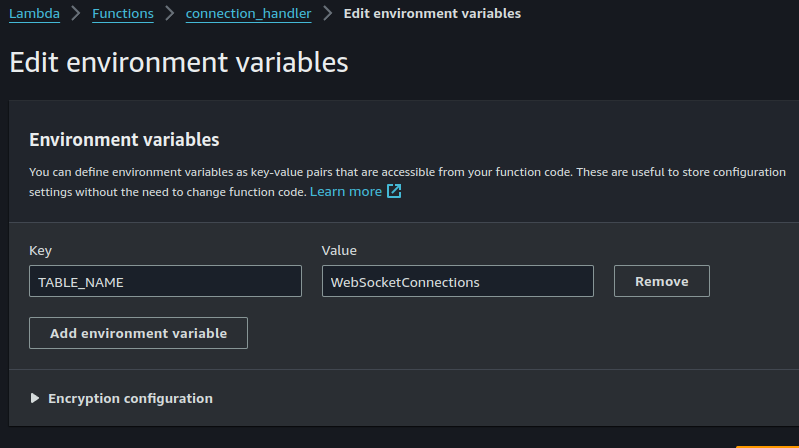
Also, click on "Configuration" > "Envronmental variables" > "Edit" > "Add Environmental variables".
TABLE_NAME = WebSocketConnections
The connectionId is generated automatically by the API Gateway when a client connects to the WebSocket API. It is a unique identifier assigned to each WebSocket connection, which ensures that the server can distinguish between different clients.
How the connectionId is Generated and Used
- Client Initiates WebSocket Connection:
- When a client connects to the WebSocket API, the API Gateway automatically generates a unique
connectionIdfor that connection. ThisconnectionIdis used to identify and manage the connection throughout its lifecycle.
- When a client connects to the WebSocket API, the API Gateway automatically generates a unique
- API Gateway Passes
connectionIdto Lambda Function:- The
connectionIdis included in the event data that the API Gateway passes to the Lambda function handling the connection request. Specifically, it is available inevent['requestContext']['connectionId'].
- The
Full Workflow with Connection ID
- Customer Opens Chat:
- The customer’s browser (or mobile app) opens a WebSocket connection to the API Gateway endpoint.
- API Gateway generates a unique connection ID and establishes the connection.
- Connection Handler Triggered:
- API Gateway triggers the Connection Handler Lambda function, passing the connection ID in the event data.
- The Connection Handler extracts the connection ID and stores it in DynamoDB, associating it with the customer session.
- Storing Connection Information:
- The connection ID, along with any additional relevant information (e.g., user identifier, session details), is stored in DynamoDB.
- This allows the system to track active connections and manage message routing effectively.
By using the connection ID generated by API Gateway, the chat application can ensure that messages are correctly routed to the connected clients (both customers and support agents) based on their unique session identifiers. Note also that we are using a Cognito authorizer for this impolementation. If we were to use a Lambda authorizer, the connection_handler function will contain authorization logic. I have previously written about how to implement Cognito authorizers and Lambda authorizers.
3.2: Message handler:
The message_handler function processes incoming chat messages from clients. It broadcasts these messages to all connected clients, stores them in a DynamoDB table for chat history, and sends notifications to support agents via SNS.
message_handler:
import boto3
import os
import json
from datetime import datetime

dynamodb = boto3.resource('dynamodb')
table = dynamodb.Table(os.environ['TABLE_NAME'])
history_table = dynamodb.Table(os.environ['CHAT_HISTORY_TABLE'])
client = boto3.client('apigatewaymanagementapi', endpoint_url=os.environ['APIG_ENDPOINT'])
sns = boto3.client('sns')
sns_topic_arn = os.environ['SNS_TOPIC_ARN']

def lambda_handler(event, context):
    print(f'Received Event: {event}')
    print(f'Request Context: {event['requestContext']}')
    connection_id = event['requestContext']['connectionId']
    # principal_id = event['requestContext']['authorizer']['principalId']
    message_data = json.loads(event['body'])
    message = message_data['message']
    # sender = message_data.get('sender', principal_id)
    sender = message_data.get('sender')
    chat_room_id = message_data.get('chatRoomId', 'default')
    timestamp = datetime.utcnow().isoformat()

    # Broadcast message to all connected clients
    connections = table.scan()['Items']
    for conn in connections:
        if conn['connectionId'] != connection_id:
            try:
                client.post_to_connection(
                    ConnectionId=conn['connectionId'],
                    Data=json.dumps({'sender': sender, 'message': message, 'timestamp': timestamp})
                )
            except client.exceptions.GoneException:
                table.delete_item(Key={'connectionId': conn['connectionId']})

    # Store message in ChatHistory table
    history_table.put_item(Item={
        'ChatRoomId': chat_room_id,
        'Timestamp': timestamp,
        'Message': message,
        'Sender': sender
    })

    # Publish to SNS Topic for support agent notification
    sns.publish(
        TopicArn=sns_topic_arn,
        Message=json.dumps({'sender': sender, 'message': message, 'timestamp': timestamp}),
        Subject='New Chat Message'
    )

    return {'statusCode': 200, 'body': 'Message sent.'}
The function receives a message from a client, processes it, broadcasts it to other clients, stores it in DynamoDB, and sends notifications to support agents.
We will come back later to add the environmental variables configuration. But we must immediately update the function's policies.
Add the following inline policy:
{
	"Version": "2012-10-17",
	"Statement": [
		{
			"Sid": "VisualEditor0",
			"Effect": "Allow",
			"Action": [
				"sns:Publish",
				"dynamodb:PutItem",
				"dynamodb:DeleteItem",
				"dynamodb:Scan"
			],
			"Resource": [
				"arn:aws:dynamodb:us-east-1:123456789012:table/WebSocketConnections",
				"arn:aws:dynamodb:us-east-1:123456789012:table/ChatHistory",
				"arn:aws:sns:us-east-1:1234567891012:NewChatMessages"
			]
		}
	]
}
Replace the "AccountId" values as appropriate.
3.3: Disconnection Handler:
The disconnection_handler function handles the disconnection of WebSocket clients. When a client disconnects, this function is triggered to remove the client's connection ID from the DynamoDB table, ensuring the list of active connections remains accurate.
disconnection_handler:
import boto3
import os

dynamodb = boto3.resource('dynamodb')
table = dynamodb.Table(os.environ['TABLE_NAME'])

def lambda_handler(event, context):
    connection_id = event['requestContext']['connectionId']
    table.delete_item(Key={'connectionId': connection_id})
    return {'statusCode': 200}
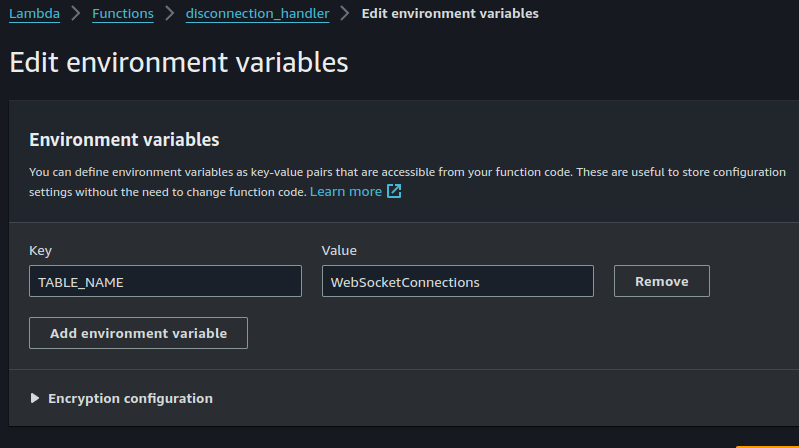
Click on "Configuration" > "Environmental variables".
TABLE_NAME = WebSocketConnections.
Click on "Configuration" > "permissions". Click on the role. Add the following inline policy:
{
	"Version": "2012-10-17",
	"Statement": [
		{
			"Sid": "VisualEditor0",
			"Effect": "Allow",
			"Action": "dynamodb:DeleteItem",
			"Resource": "arn:aws:dynamodb:us-east-1:538578370232:table/WebSocketConnections"
		}
	]
}
Step 4: Set Up the API Gateway
4.1: Create IAM Role for API Gateway
Firstly, we must create the necessary IAM role that allows the API Gateway to invoke our lambda functions.
Click on "Role" > "create role". Select API Gateway as the use case.
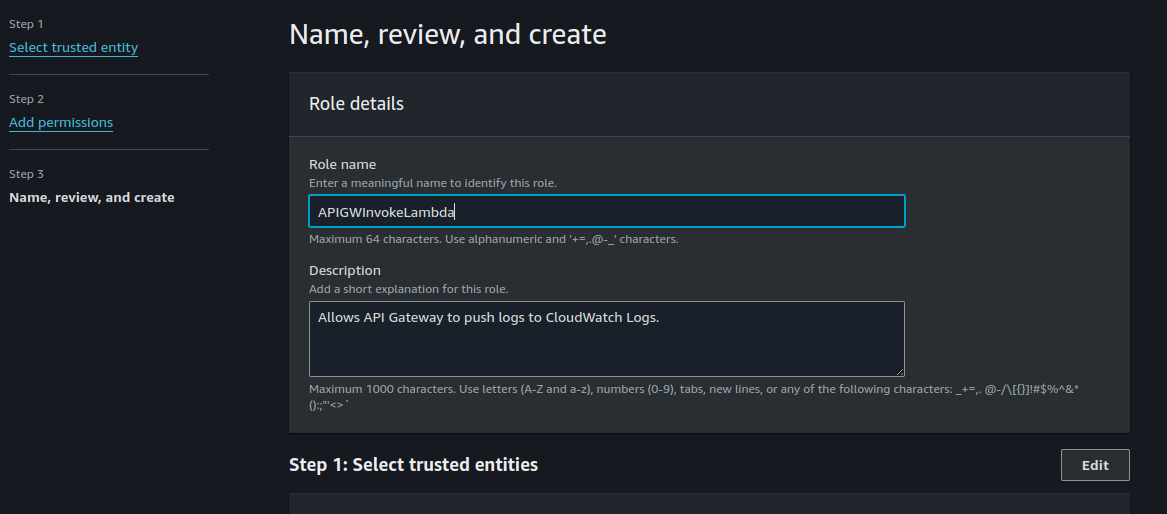
Click on "Save".
Now select the role, click "Edit" > "Attach Policies' > "Inline Policy"
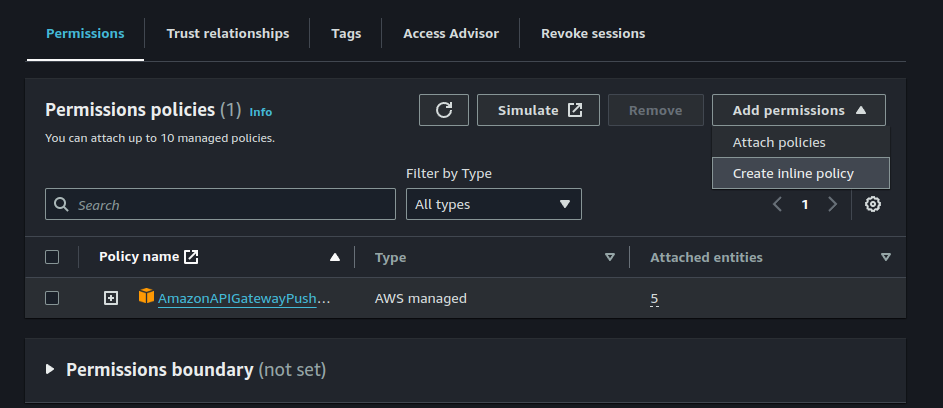
Paste in the following:
{
	"Version": "2012-10-17",
	"Statement": [
		{
			"Sid": "VisualEditor0",
			"Effect": "Allow",
			"Action": "lambda:InvokeFunction",
			"Resource": [
				"arn:aws:lambda:us-east-1:123456789012:function:message_handler",
				"arn:aws:lambda:us-east-1:123456789012:function:connection_handler",
				"arn:aws:lambda:us-east-1:123456789012:function:disconnection_handler"
			]
		}
	]
}
Make sure to replace "AccountID" values. click on "Save".
4.2 Create WebSocket API
The API Gateway in this project facilitates real-time communication by managing WebSocket connections. It routes connection, disconnection, and message events to the appropriate Lambda functions. This allows for seamless interaction between clients and the backend services, enabling real-time chat functionality.
Open the API Gateway Console.

Create a new WebSocket API.
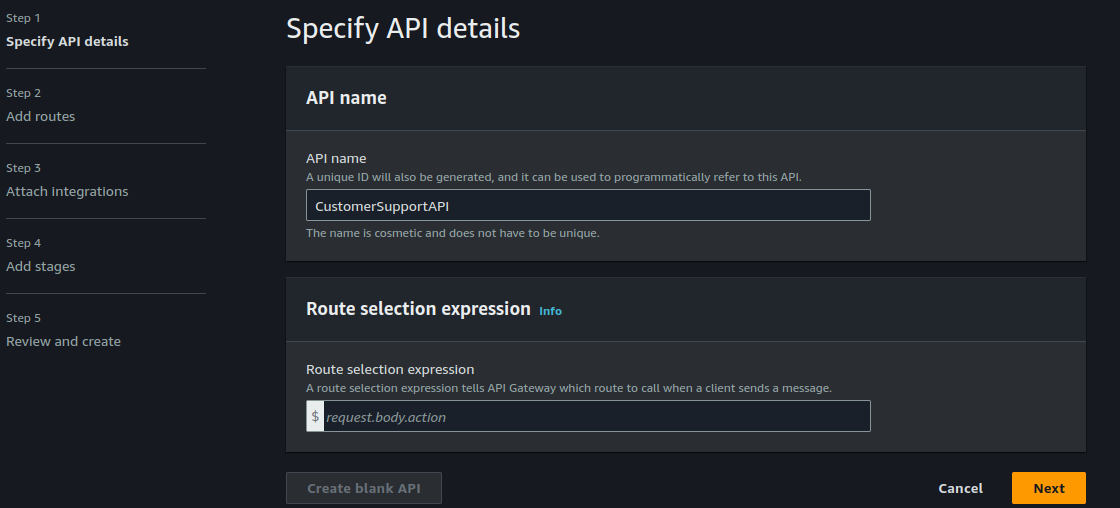
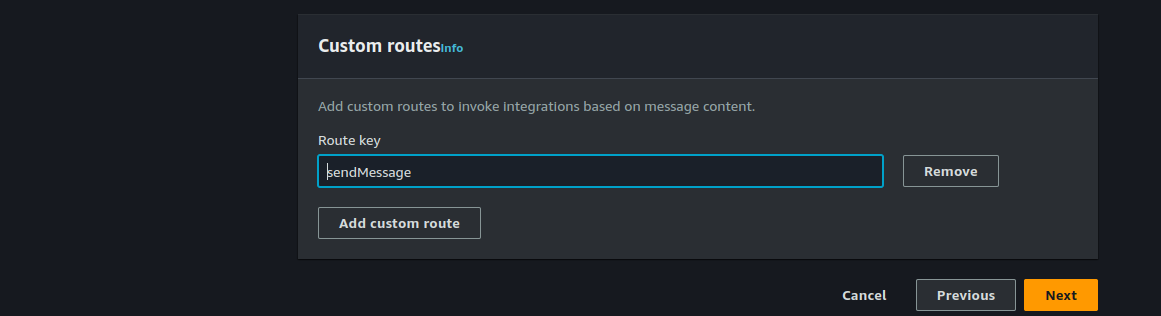
For the "Route selection expression" in your API Gateway WebSocket API, you should specify how API Gateway determines which route to call when it receives a message. A common expression is to use a field in the JSON payload sent by the client. This expression tells API Gateway to look for an
actionfield in the message body sent by the client to determine the appropriate route.request.body.actionDefine routes:
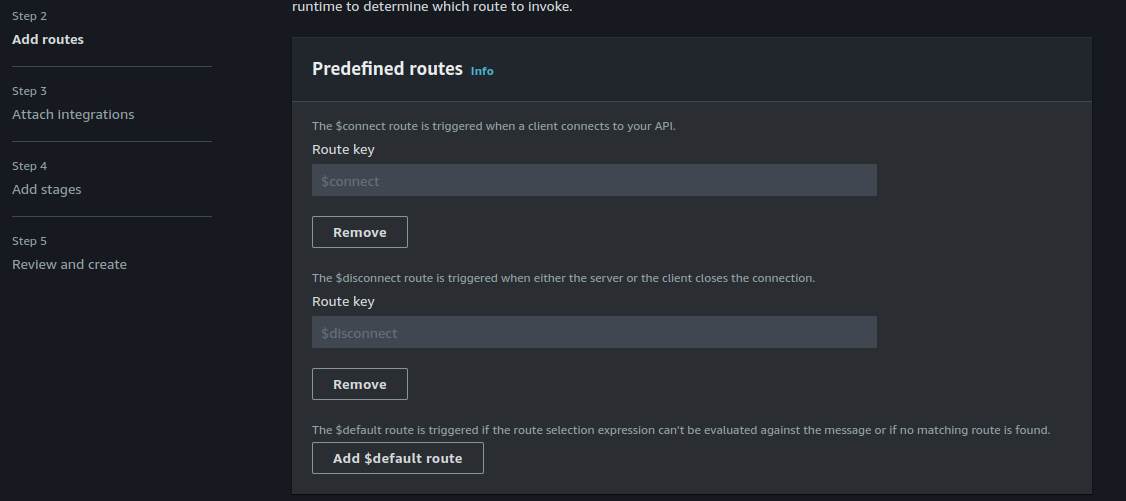
$connect: Integrate with the Connection Handler.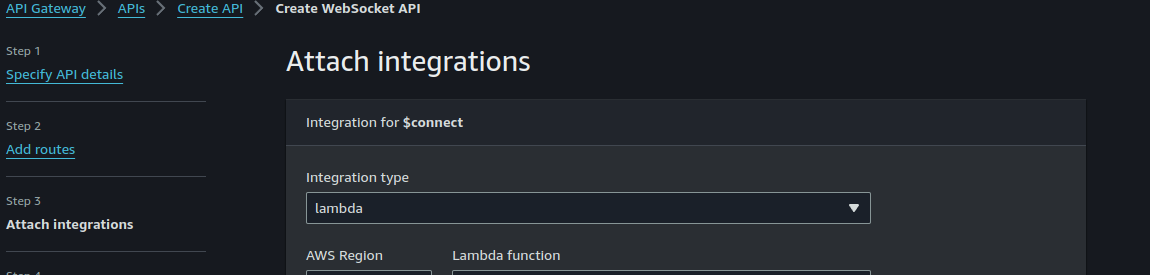
$disconnect: Integrate with the Disconnection Handler.
$default: Integrate with the Message Handler.
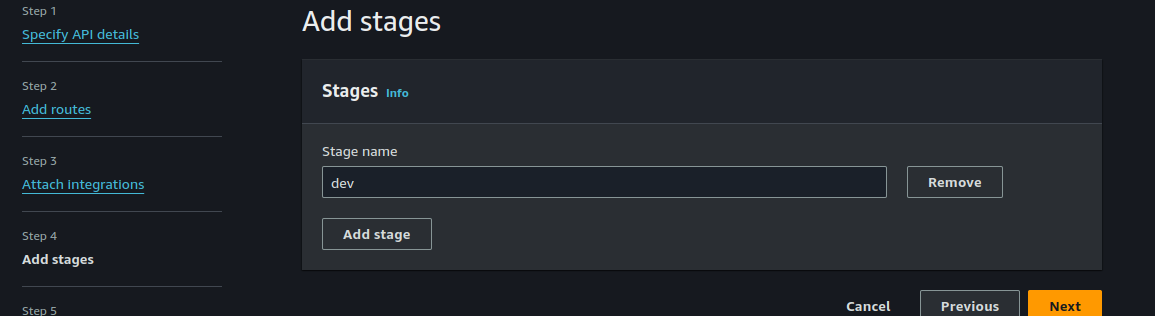
4.3 Deploy the API
- Deploy the API to a stage (e.g.,
dev).
Click on "Create".
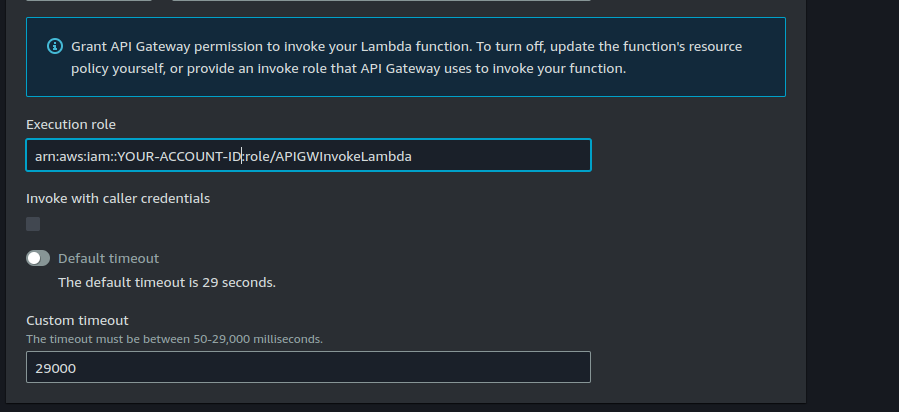
4.4: Attach IAM Role to Routes:
For each of the routes, we'll edit the "Integration Requests" tab to add our IAM Role.
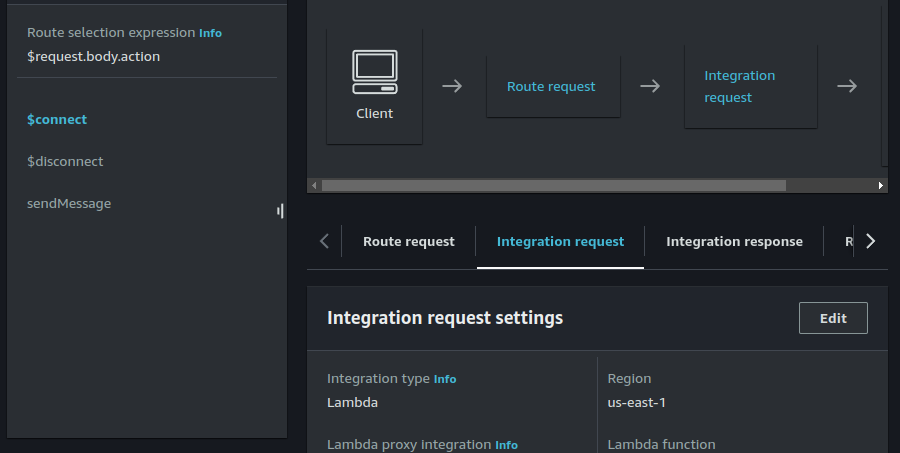
Repeat same steps for $disconnect and sendMessage routes.
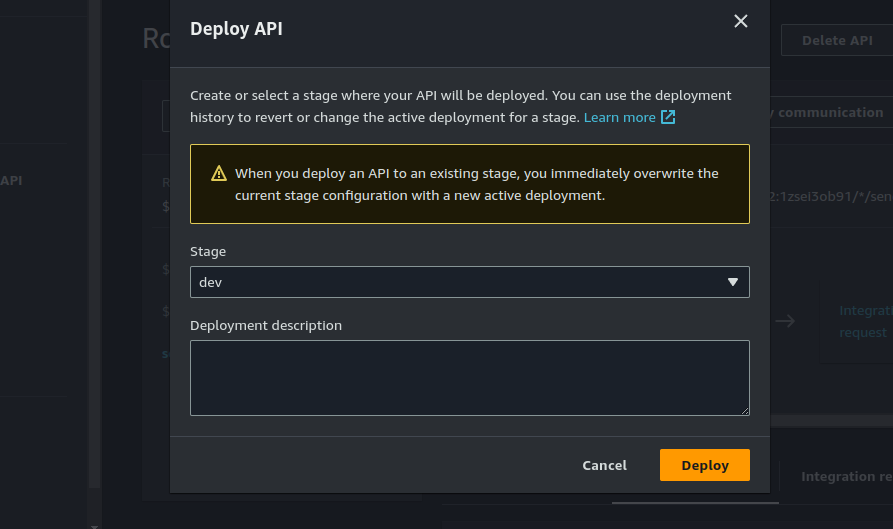
4.5: Redeploy the API
Click on "Deploy API". Select the "dev" stage and deploy.
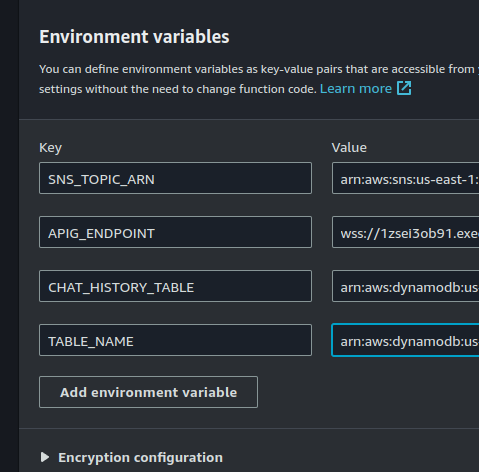
Step 5: Update Environmental variables for the nmessage_handler function
On the lambda function console, select the message_handler function. Click on "Configuration" > "Environmental variables" > "Edit".
Enter the values for:
- SNS_TOPIC_ARN
- APIG_ENDPOINT
The real API Gateway endpoint for your WebSocket API is the WebSocket URL.
- CHAT_HISTORY_TABLE
- TABLE_NAME
Step 6: Test the Architecture
We have completed the necessary steps for building the backend. Let us test first to see that our implementation so far is working before proceeding to set up the frontend.
We shall be using wscat to test this out.
- Install wscat
npm install -g wscat- Connect to the API endpoint
wscat -c wss://YOUR-API-ENDPOINT
# E.g: wscat -c wss://1zsei3ob91.execute-api.us-east-1.amazonaws.com/dev/
- Once connected, you can type messages directly in the terminal. For example:
{ "sender": "JohnDoe", "action": "sendMessage", "message": "Hello, this is a test message!" }Press Enter to send the message.

Head over to your DynamoDB table to confirm if messages are being persisted:
You can also check CloudWatch for function logs to ensure everything performed as expected.
Final Thoughts
In this project, we successfully built a real-time single-page chat application on AWS using API Gateway and a serverless architecture. By leveraging AWS services such as API Gateway WebSocket, Lambda functions, DynamoDB, and SNS, we created a scalable and efficient solution for real-time communication.
We began by setting up the necessary AWS resources, including DynamoDB tables for connection information and chat history, and an API Gateway for managing WebSocket connections. We developed Lambda functions to handle connections, messages, and disconnections, ensuring seamless interaction between clients.
Our Lambda functions utilized the API Gateway Management API to broadcast messages to all connected clients and stored chat messages in DynamoDB for persistence. Additionally, we configured an SNS topic to send push notifications to support agents about new incoming chats, ensuring timely responses.
Throughout the process, we focused on creating a robust, scalable, and maintainable architecture. This project demonstrates the power and flexibility of AWS serverless services in building real-time applications, providing a solid foundation for further enhancements and scaling as needed.
By following these steps and leveraging AWS's serverless capabilities, you can build efficient, scalable, and cost-effective real-time applications suitable for various use cases, including customer support, live updates, and collaborative tools.
Next Steps
- Implement the frontend.
You can go ahead and build a react frontend for the chat application. Also, you could build a static website hosted on Amazon S3 for the frontend.
- Implement Authentication.
You can add authentication to your application by incorporating Amazon Cognito. Also, you could implement custom authorization logic using Lambda Authorizers.
Happy Clouding!!!
Did you like this post?
If you did, please buy me coffee 😊