Building A Proof Of Concept For A Serverless E-commerce Platform Using Terraform
In today's rapidly evolving technological landscape, serverless architecture has emerged as a powerful paradigm, offering developers the ability to build and deploy applications without the need to manage underlying infrastructure. Serverless solutions enable organizations to focus on writing code while abstracting away server management, thus reducing operational overhead and enhancing scalability.
Two prominent tools that facilitate the development and deployment of serverless applications are Terraform and AWS Serverless Application Model (SAM). Terraform, developed by HashiCorp, is an open-source infrastructure as code (IaC) tool that allows developers to define and provision data center infrastructure using a high-level configuration language. AWS SAM, on the other hand, is a framework provided by Amazon Web Services (AWS) specifically designed for building serverless applications, offering simplified deployment and management of serverless functions, APIs, and more.
This guide aims to provide a comprehensive overview of building a proof of concept (PoC) for a serverless solution using Terraform. We will explore the fundamental concepts of serverless architecture, delve into the intricacies of infrastructure as code with Terraform, and leverage the capabilities of Terraform to deploy and manage our serverless application. By the end of this guide, you will have a solid understanding of how to effectively utilize these tools to create robust, scalable, and cost-efficient serverless solutions.
E-commerce Platform: Serverless Architecture Overview
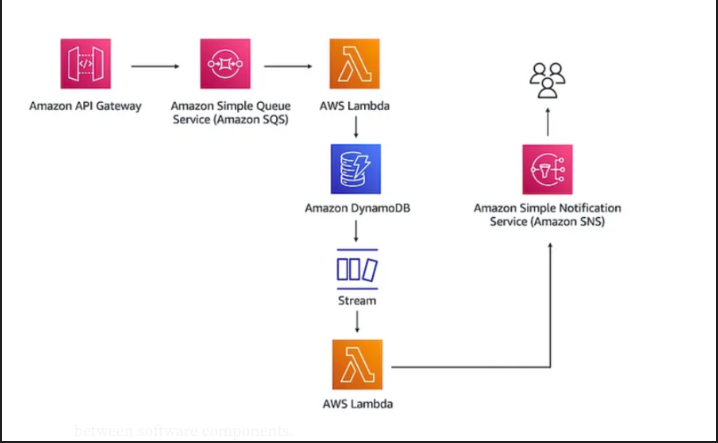
To illustrate these concepts, we will build a proof of concept for an e-commerce platform using a serverless architecture. The key components and their interactions in this architecture are as follows:
1. Amazon API Gateway:
- Role: Serves as the entry point for client applications to interact with the backend services.
- Functionality: Receives API calls from the e-commerce platform, specifically the order API call initiated by customers when they place an order.
2. Amazon Simple Queue Service (Amazon SQS):
- Role: Acts as a message queue to decouple and scale the order processing system.
- Functionality: Receives and queues the order details from the API Gateway. This ensures that even if there is a surge in order placements, the system can handle them efficiently without dropping any requests. Imagine that there's a Black Friday promo and our API gateway is handling thousands of requests per second. Our Lambda functions will be unable to handle this capacity and will end up dropping some requests due to a feature of lambda called concurrency. The SQS queue decouples the integration of the requests and the application logic in order to prevent throttling due to concurrency limits. I've previous;y written about concurrency and throttling in lambda functions and you can find it here.
3. AWS Lambda (Order Processor):
- Role: Processes the order details received from the SQS queue.
- Functionality: Extracts the order information from the SQS message, performs necessary business logic (such as inventory checks, payment processing, etc.), and stores the order data in DynamoDB.
4. Amazon DynamoDB:
- Role: Serves as the primary database for storing order information.
- Functionality: Provides a fast and scalable NoSQL database for storing detailed information about each order, including customer details, items purchased, order status, and timestamps.
5. DynamoDB Streams:
- Role: Captures real-time data changes in the DynamoDB table.
- Functionality: Streams the changes (inserts, updates, deletes) made to the order data. This is crucial for triggering downstream processes or analytics based on the order data.
6. AWS Lambda (Stream Processor):
- Role: Processes the data from DynamoDB Streams.
- Functionality: Listens to the stream of changes in the DynamoDB table and performs actions such as updating other systems, aggregating data for analytics, or triggering notifications. In this case, it send publishes messages to an SNS topic.
7. Amazon Simple Notification Service (Amazon SNS):
- Role: Manages and distributes notifications to various subscribers.
- Functionality: Sends notifications to customers and other stakeholders. For example, it can send order confirmation messages to customers via email or SMS, notify the warehouse for order fulfillment, or alert the sales team about high-value orders.
This serverless architecture efficiently handles order processing, ensuring scalability, reliability, and decoupling of components. By leveraging Terraform, we can deploy and manage this architecture seamlessly, providing a robust and scalable solution for modern e-commerce platforms.
Building Our serverless Solution Using Terraform
The complete terraform code for this project can be found on GitHub.
N.B: I advice that you set your default region to us-east-1. This project was extensively tested in the us-east-1 region.
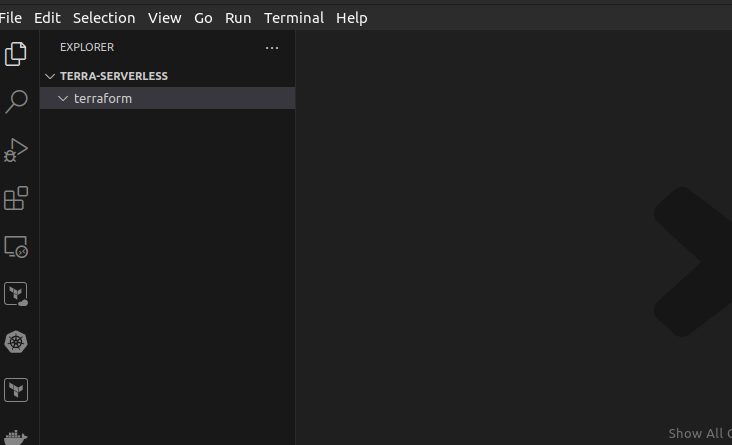
Step 1: Create A Project Structure
You need to create a project structure, so you're able to properly organize your files. My Project structure currently looks like this:
Step 2: Create the Application Logic
The application logic is the central part of our backend application. The logic consists of two lambda functions. The first lambda function is responsible for handling important tasks like extracting the customer order information from the SQS queue, performing inventory checks, processing payment and persisting all these information in the Database (DynamoDB table).
- Create a "main.py" file and add the following Python code:
import boto3, uuid

client = boto3.resource('dynamodb')
table = client.Table("orders")

def lambda_handler(event, context):
    for record in event['Records']:
        print("test")
        payload = record["body"]
        print(str(payload))
        table.put_item(Item= {'orderID': str(uuid.uuid4()),'order':  payload})
The second function is responsible for downstream processing tasks like notifying the logistics department of an order fulfilment requet. It can also notify the customer via email that their order has been processed. This function uses an event source mapping to read from the DynamoDB stream. You can read more about how AWS lambda event source mappings work here.
- Create a "main2.py" file and add the following Python code:
import boto3, json

client = boto3.client('sns')

def lambda_handler(event, context):

    for record in event["Records"]:

        if record['eventName'] == 'INSERT':
            new_record = record['dynamodb']['NewImage']
            response = client.publish(
                TargetArn='arn:aws:sns:us-east-1:ACCOUNTID:POC-Topic', #THIS ARN MUST BE CHANGED.
                Message=json.dumps({'default': json.dumps(new_record)}),
                MessageStructure='json'
            )
Be sure to replace "ACCOUNTID" with your AWS account ID.
Step 3: Create the DynamoDB Table
AWS DynamoDB is our database of choice for storing detailed information about customer orders. It is a NoSQL database optimized for efficency, capable of handling millions of transactions per second with millisecond latency.
- Create a "table.tf" file and add the following terraform code:
# Create DynamoDB table
resource "aws_dynamodb_table" "dynamodb-table" {
  name             = "orders"
  billing_mode     = "PAY_PER_REQUEST"
  hash_key         = "orderID"
  stream_enabled   = true
  stream_view_type = "NEW_IMAGE"

  attribute {
    name = "orderID"
    type = "S"
  }

  ttl {
    attribute_name = "TimeToExist"
    enabled        = false
  }

  tags = {
    Name        = "ordersTable"
    Environment = "production"
  }
}
Step 4: Create SNS and Subscription
The SNS topic is used to notify the logistics department about an incoming order. Our second lambda function publishes mesages to this topic while the logistics department is subscribed to the topic. Notice in the code below that the value of the email address is a variable. You'll be asked to provide this value during terraform apply.
- Create a "sns.tf" file and add the following terraform code:
resource "aws_sns_topic" "topic" {
  name = "POC-Topic"
}

resource "aws_sns_topic_subscription" "topic_sub" {
  topic_arn = aws_sns_topic.topic.arn
  protocol  = "email"
  endpoint  = var.email_address
}- Also create a "variables.tf" file and declare your variables.
variable "email_address" {
  description = "The Email address to be subscribed to the SNS topic."
  type        = string
}
Step 5: Create an SQS Queue
The SQS Queue serves an important purpose in our application architecture. It's purpose is to receive and enqueue the order details, ensuring that we don't ever lose our data due to lambda throttling. This greatly improves the resiliency and scalability of our architecture.
- Create a "sqs.tf" file and add the following terraform code:
resource "aws_sqs_queue" "standard_queue" {
  name                      = "POC-Queue"
  delay_seconds             = 90
  max_message_size          = 2048
  message_retention_seconds = 86400
  receive_wait_time_seconds = 10
  policy                    = aws_iam_policy.lambda_dynamo_sqs_apigw.policy
}
Step 6: Create the Lambda Functions
- Create a "lambda.tf" file and add the code below:
data "archive_file" "lambda" {
  type        = "zip"
  source_file = "main.py"
  output_path = "main.py.zip"
}
data "archive_file" "lambda2" {
  type        = "zip"
  source_file = "main2.py"
  output_path = "main2.py.zip"
}

resource "aws_lambda_function" "python_lambda" {
  filename         = "main.py.zip"
  function_name    = "POC_Lambda-1"
  role             = aws_iam_role.role1.arn
  source_code_hash = data.archive_file.lambda.output_base64sha256
  runtime          = "python3.9"
  handler          = "main.lambda_handler"
}

resource "aws_lambda_function" "python_lambda2" {
  filename         = "main2.py.zip"
  function_name    = "POC_Lambda-2"
  role             = aws_iam_role.role2.arn
  source_code_hash = data.archive_file.lambda2.output_base64sha256
  runtime          = "python3.9"
  handler          = "main2.lambda_handler"
}

resource "aws_lambda_event_source_mapping" "sqs_trigger" {
  event_source_arn = aws_sqs_queue.standard_queue.arn
  function_name    = aws_lambda_function.python_lambda.arn
}

resource "aws_lambda_event_source_mapping" "dynamo_trigger" {
  event_source_arn  = aws_dynamodb_table.dynamodb-table.stream_arn
  function_name     = aws_lambda_function.python_lambda2.arn
  starting_position = "LATEST"
}
Step 7: Create and Configure the API Gateway
The API Gateway is the entrypoint to our backend services. It receives customer orders and forwards them to the necessary backend service. It also transfers responses from the backend service to the frontend.
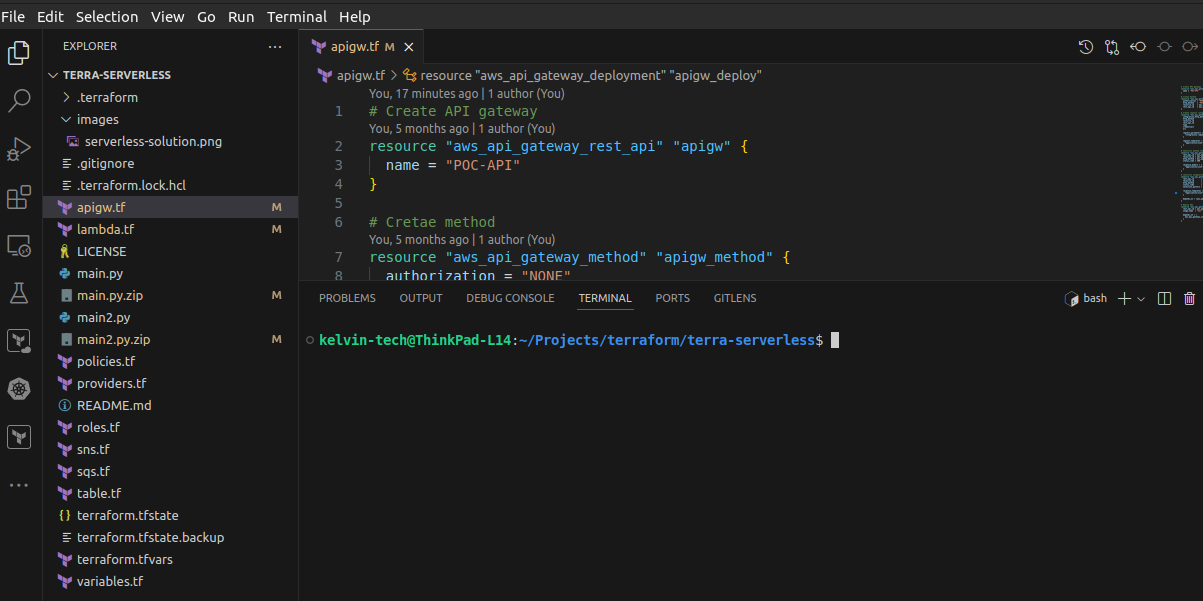
- Create an "apigw.tf" file and add the following code:
# Create API gateway
resource "aws_api_gateway_rest_api" "apigw" {
  name = "POC-API"
}

# Cretae method
resource "aws_api_gateway_method" "apigw_method" {
  authorization = "NONE"
  http_method   = "POST"
  resource_id   = aws_api_gateway_rest_api.apigw.root_resource_id
  rest_api_id   = aws_api_gateway_rest_api.apigw.id
}

# Create request integration
resource "aws_api_gateway_integration" "apigw_integration" {
  integration_http_method = "POST"
  http_method             = aws_api_gateway_method.apigw_method.http_method
  resource_id             = aws_api_gateway_rest_api.apigw.root_resource_id
  rest_api_id             = aws_api_gateway_rest_api.apigw.id
  type                    = "AWS"
  credentials             = aws_iam_role.api.arn
  uri                     = "arn:aws:apigateway:us-east-1:sqs:path/${aws_sqs_queue.standard_queue.name}"

  request_parameters = {
    "integration.request.header.Content-Type" = "'application/x-www-form-urlencoded'"
  }

  request_templates = {
    "application/json" = "Action=SendMessage&MessageBody=$input.body"
  }
}

# Construct method response
resource "aws_api_gateway_method_response" "success_response" {
  rest_api_id = aws_api_gateway_rest_api.apigw.id
  resource_id = aws_api_gateway_rest_api.apigw.root_resource_id
  http_method = aws_api_gateway_method.apigw_method.http_method
  status_code = 200

  response_models = {
    "application/json" = "Empty"
  }
}

# construct integration response
resource "aws_api_gateway_integration_response" "success_response" {
  rest_api_id       = aws_api_gateway_rest_api.apigw.id
  resource_id       = aws_api_gateway_rest_api.apigw.root_resource_id
  http_method       = aws_api_gateway_method.apigw_method.http_method
  status_code       = aws_api_gateway_method_response.success_response.status_code
  selection_pattern = "^2[0-9][0-9]" // regex pattern for any 200 message that comes back from SQS

  response_templates = {
    "application/json" = "{\"message\": \"Order Successfully processed.\"}"
  }

  depends_on = [aws_api_gateway_integration.apigw_integration]
}

# Deploy API
resource "aws_api_gateway_deployment" "apigw_deploy" {
  rest_api_id = aws_api_gateway_rest_api.apigw.id
  stage_name  = "dev"

  depends_on = [
    aws_api_gateway_integration.apigw_integration
  ]
}
Step 8: Create IAM Policies and Roles
AWS services cannot talk to each other without special authorizations. Our application has so many interconnected services and it is necessary to provide them with the required permissions they need.
- Create a "policies.tf" file and add the following:
# Create IAM Policies

resource "aws_iam_policy" "lambda_dynamo_sqs_apigw" {
  name        = "Lambda-Write-DynamoDB"
  path        = "/"
  description = "A policy for lambda to put items into DunamoDB"

  policy = jsonencode({
    "Version" : "2012-10-17",
    "Statement" : [
      {
        "Sid" : "VisualEditor0",
        "Effect" : "Allow",
        "Action" : [
          "dynamodb:PutItem",
          "dynamodb:DescribeTable"
        ],
        "Resource" : "*"
      },
      {
        "Sid" : "VisualEditor1",
        "Effect" : "Allow",
        "Action" : [
          "sqs:DeleteMessage",
          "sqs:ReceiveMessage",
          "sqs:GetQueueAttributes",
          "sqs:ChangeMessageVisibility"
        ],
        "Resource" : "*"
      },
      {
        "Effect" : "Allow",
        "Action" : [
          "logs:CreateLogGroup",
          "logs:CreateLogStream",
          "logs:DescribeLogGroups",
          "logs:DescribeLogStreams",
          "logs:PutLogEvents",
          "logs:GetLogEvents",
          "logs:FilterLogEvents"
        ],
        "Resource" : "*"
      }
    ]
  })
}

resource "aws_iam_policy" "lambda_sns" {
  name        = "Lambda-SNS-Publish"
  path        = "/"
  description = "A policy for Amazon SNS to get, list, and publish topics that are received by Lambda"

  policy = jsonencode({
    "Version" : "2012-10-17",
    "Statement" : [
      {
        "Sid" : "VisualEditor0",
        "Effect" : "Allow",
        "Action" : [
          "sns:Publish",
          "sns:GetTopicAttributes",
          "sns:ListTopics"
        ],
        "Resource" : "*"
      }
    ]
  })
}

resource "aws_iam_policy" "lambda_dynamostreams" {
  name        = "Lambda-DynamoDBStreams-Read"
  path        = "/"
  description = "A policy for Lambda to get records from DynamoDB Streams"

  policy = jsonencode({
    "Version" : "2012-10-17",
    "Statement" : [
      {
        "Sid" : "VisualEditor0",
        "Effect" : "Allow",
        "Action" : [
          "dynamodb:GetShardIterator",
          "dynamodb:DescribeStream",
          "dynamodb:ListStreams",
          "dynamodb:GetRecords"
        ],
        "Resource" : "*"
      }
    ]
  })
}

# Create policy for api gw
resource "aws_iam_policy" "api" {
  name = "APIGW-SQS"

  policy = <<EOF
{
    "Version": "2012-10-17",
    "Statement": [
      {
        "Effect": "Allow",
        "Action": [
          "logs:CreateLogGroup",
          "logs:CreateLogStream",
          "logs:DescribeLogGroups",
          "logs:DescribeLogStreams",
          "logs:PutLogEvents",
          "logs:GetLogEvents",
          "logs:FilterLogEvents"
        ],
        "Resource": "*"
      },
      {
        "Effect": "Allow",
        "Action": [
          "sqs:GetQueueUrl",
          "sqs:ChangeMessageVisibility",
          "sqs:ListDeadLetterSourceQueues",
          "sqs:SendMessageBatch",
          "sqs:PurgeQueue",
          "sqs:ReceiveMessage",
          "sqs:SendMessage",
          "sqs:GetQueueAttributes",
          "sqs:CreateQueue",
          "sqs:ListQueueTags",
          "sqs:ChangeMessageVisibilityBatch",
          "sqs:SetQueueAttributes"
        ],
        "Resource": "*"
      },
      {
        "Effect": "Allow",
        "Action": "sqs:ListQueues",
        "Resource": "*"
      }
    ]
}
EOF
}

# Define policy document
# Create Data Sources

data "aws_iam_policy_document" "assume_role_lambda" {
  statement {
    effect = "Allow"

    principals {
      type        = "Service"
      identifiers = ["lambda.amazonaws.com"]
    }
    actions = ["sts:AssumeRole"]
  }
}

resource "aws_iam_role_policy_attachment" "api" {
  role       = aws_iam_role.api.name
  policy_arn = aws_iam_policy.api.arn
}- Now create a "roles.tf" file and add the following code:
# Create IAM Roles
resource "aws_iam_role" "role1" {
  name                = "Lambda-SQS-DynamoDB"
  path                = "/"
  assume_role_policy  = data.aws_iam_policy_document.assume_role_lambda.json
  managed_policy_arns = [aws_iam_policy.lambda_dynamo_sqs_apigw.arn]
}

resource "aws_iam_role" "role2" {
  name                = "Lambda-DynamoDBStreams-SNS"
  path                = "/"
  assume_role_policy  = data.aws_iam_policy_document.assume_role_lambda.json
  managed_policy_arns = [aws_iam_policy.lambda_dynamostreams.arn, aws_iam_policy.lambda_sns.arn]
}

resource "aws_iam_role" "api" {
  name = "my-api-role"

  assume_role_policy = <<EOF
{
  "Version": "2012-10-17",
  "Statement": [
    {
      "Action": "sts:AssumeRole",
      "Principal": {
        "Service": "apigateway.amazonaws.com"
      },
      "Effect": "Allow",
      "Sid": ""
    }
  ]
}
EOF
}
Step 9: Create A Terraform provider
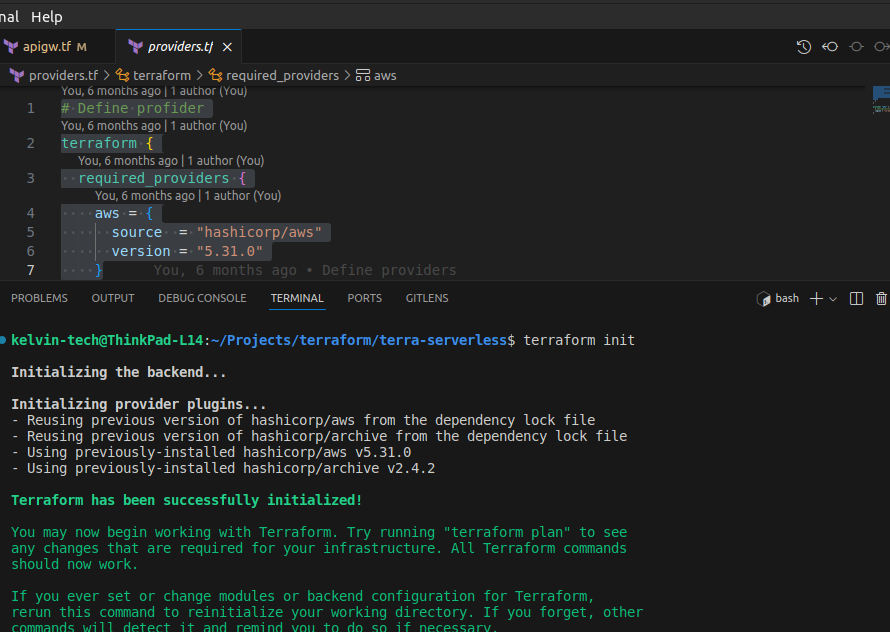
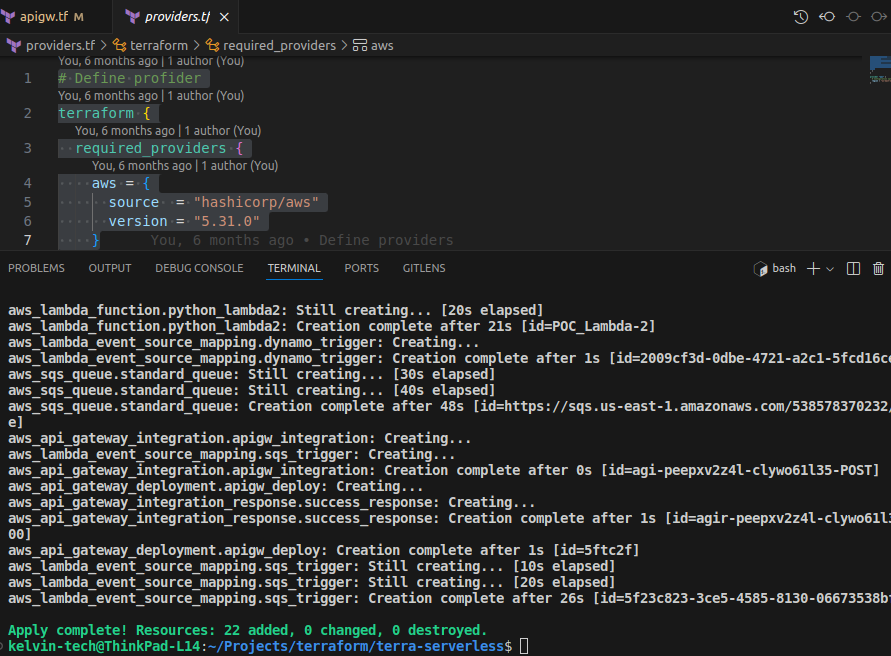
- Create a "providers.tf" file and add the following code:
 Define profider
terraform {
  required_providers {
    aws = {
      source  = "hashicorp/aws"
      version = "5.31.0"
    }
  }
}

provider "aws" {
  # Configuration options
  region = "us-east-1"
}
Step 10: Provision and Test Your Application
We have now fully defined our infrastructure in code. It is now time to set it up and test the setup.
My workspace now looks like this:
- On the terraform directory, run
terraform initto initialize the configuration.
- Now run
terraform apply -auto-approveto apply the infrastructure.
- Go through the console and examine the different resources that have been provisioned for you.
- To test your application, navigate to the API Gateway.
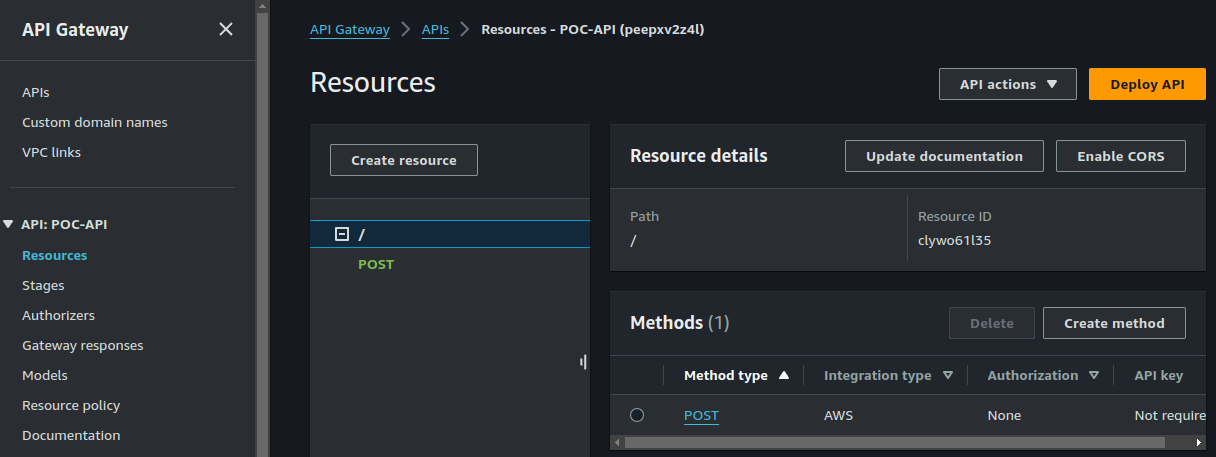
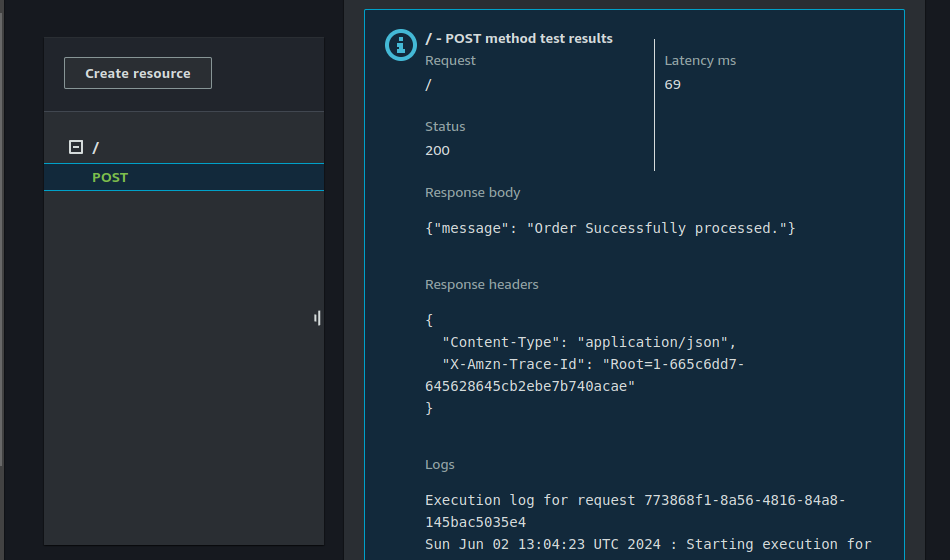
- Click on the Post method and click on "Test".
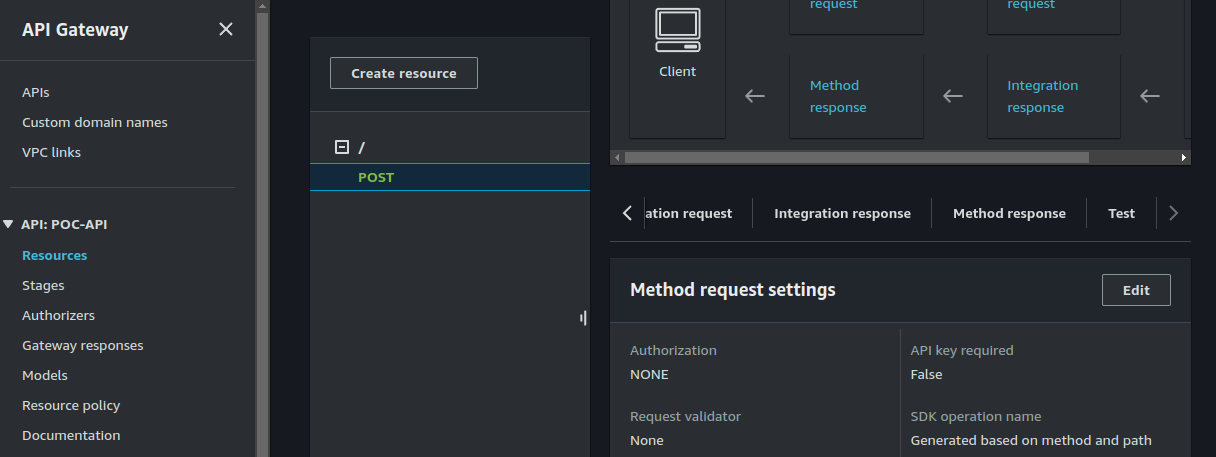
On the request body, enter the following:
{  "item": "Sneakers for Men",
"customerID":"12345"}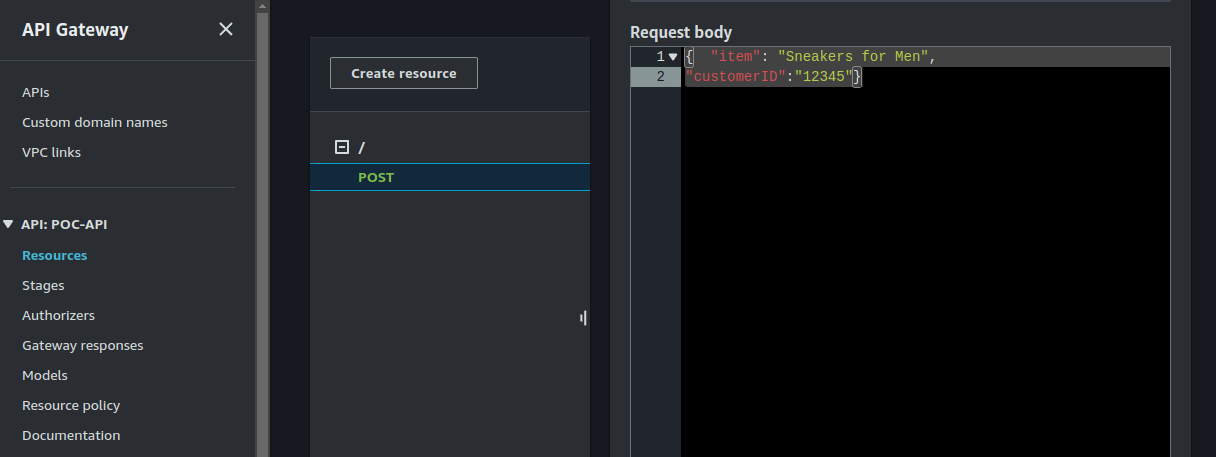
When you click on "Test", you should see the result below:
You can also test using Postman. Go to stages, copy the API url.
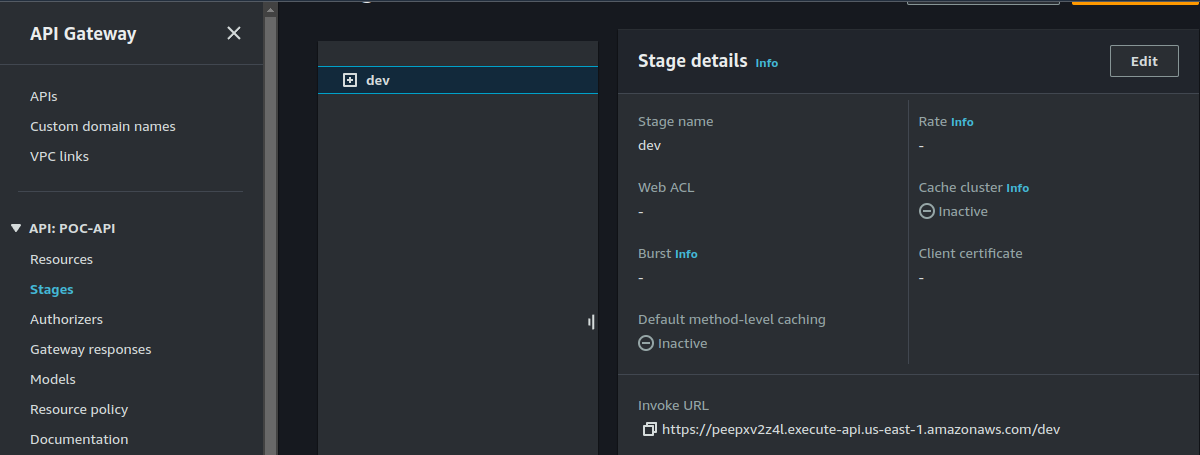
Paste the url in your Postman app.
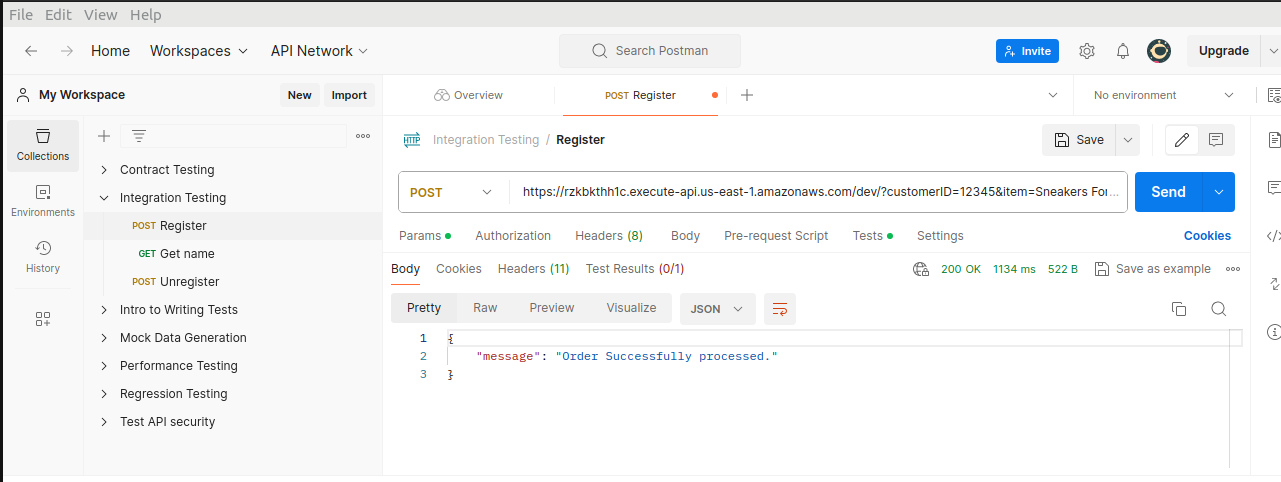
Aaaaaand.... That's it.
Happy Clouding!!!
Did you like this post?
If you did, please buy me coffee 😊