Advanced End-to-End DevOps Project: Deploying A Microservices APP To AWS EKS using Terraform, Helm, Jenkins And ArgoCD (Part I)
DevOps is a rapidly evolving space in the IT industry. As a DevOps engineer, it is paramount to keep up with the space of developments to avoid beign left behind.
One popular paradigm that has evolved to maturity in this field is GitOPs.
GitOps is a DevOps framework or practice whereby we make our Git repository a single source of truth whilst applying CI/CD and version control to infrastructure automation.
Red Hat defines it as "using Git repositories as a single source of truth to deliver infrastructure as code."
DevSecOps on the other hand is a new and improved version of DevOps that inculcates security tools and controls within the SDLC(software development life-cycle). The main goal of devsecops methodology is “shifting security left” i.e. security should be a part of the development lifecycle from the very beginning rather than being an afterthought.
In this project guide, we will be applying GitOps practices while implementing an advanced end-to-end DevSecOps pipleine that incorporates many tools.
Project Overview
This is a two-part project. In the first part we will be setting up our EC2 instances on which the CI pipeline will run.
To learn how to build a standard continuous integration pipleine with jenkins, click here.
Also, to learn how to implement GitOps using AWS suite of DevOps services, click here.
In the second part, we will set up the EKS Cluster, ArgoCD for Continuous Delivery and configure Prometheus and Grafana for application monitoring.
In this project, we will be covering the following:
- Infrastructure-as-Code: We will use terraform to provision our EC2 instances as well as the EKS Cluster.
- Jenkins Server Configuration: Install and configure essential tools on the Jenkins server, including Jenkins itself, Docker, OWASP Dependency Check, Sonarqube, and Trivy.
- EKS Cluster Deployment: Utilize Terraform to create an Amazon EKS cluster, a managed Kubernetes service on AWS.
- Load Balancer Configuration: Configure AWS Application Load Balancer (ALB) for the EKS cluster.
- ArgoCD Installation: Install and set up ArgoCD for continuous delivery and GitOps.
- Sonarqube Integration: Integrate Sonarqube for code quality analysis in the DevSecOps pipeline.
- Monitoring Setup: Implement monitoring for the EKS cluster using Helm, Prometheus, and Grafana.
- ArgoCD Application Deployment: Use ArgoCD to deploy the microservices application, including database and ingress components.
PART I: Setting Up The CI Pipeline
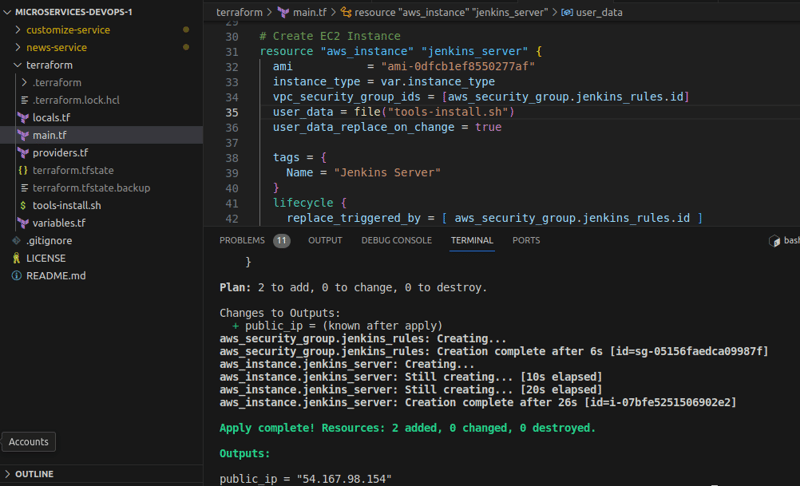
- Step 1: Provision The EC2 Instance
Clone the Git repository.
cd into the terraform directory.
Run terraform init, after that run terraform plan to see proposed infrastructural changes.
Run terraform apply to effect these changes and provision the instance.
The instance is bootstraped with user-data that will automatically install jenkins, sonarqube, trivy and docker once it is provisioned.
- Step 2: Modify The Application Code
This is a simple yet crucial step. In the Jenkinsfile contained in the repository you just cloned, you must change all occurances of "kelvinskell" to your DockerHub username. This is very necessary if you want to implement this project on your end.
- Step 3: Configure The Jenkins Server
On the browser, login to the jenkins server.
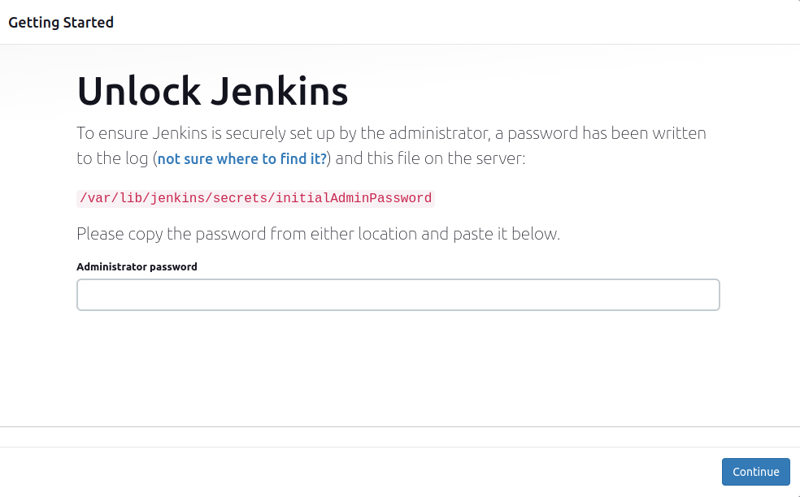
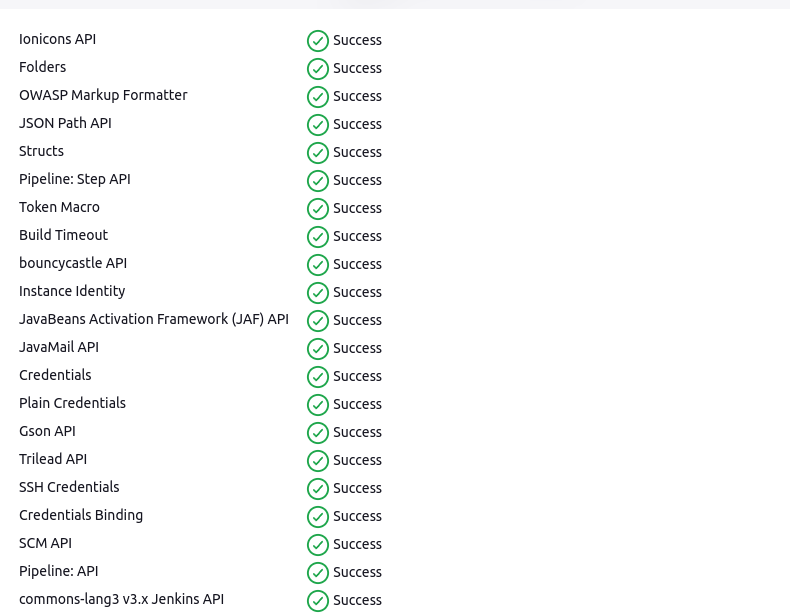
Install suggested plugins and complete the registration.
Go to Manage Jenkins, Plugins,and install the following plugins: Docker, Docker Commons, Docker pipeline, SonarQube Scanner, Sonar quality gates, SSH2 Easy, OWASP dependency check, OWASP Markup Formatter Plugin, GitHub API pluin and GitHub pipeline plugin.
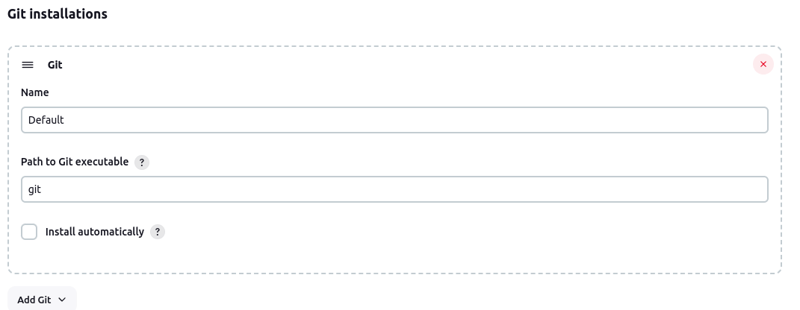
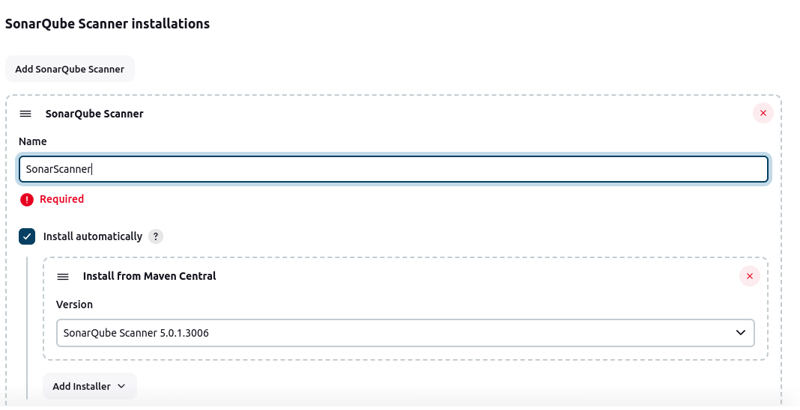
Configure tools: Go to Dashborad > Manage jenkins > Tools Git Installation
Sonar Scanner Installation
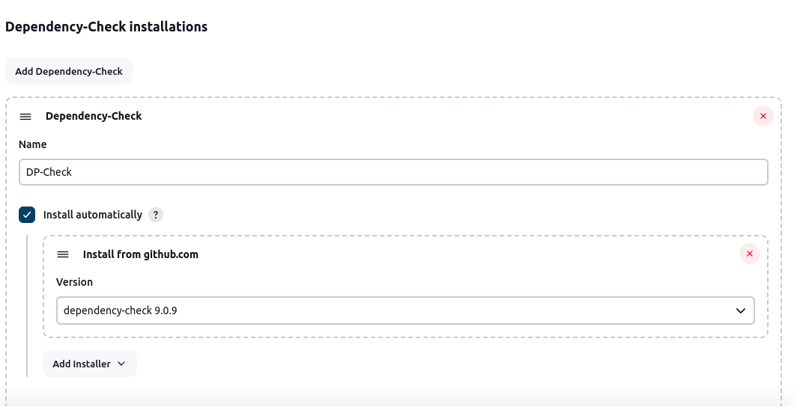
Dependency Check
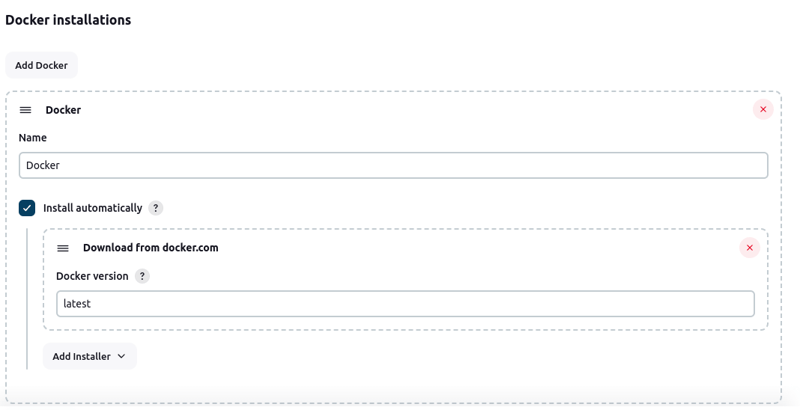
Docker Installation
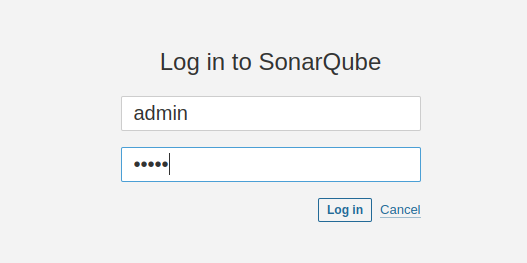
- Step 4: Configure SonarQube
On the browser, connect to your Jenkins server IP address on port 9000 and the log in to the server. The default username and password is "admin".
Once you log in, click on "Manually".
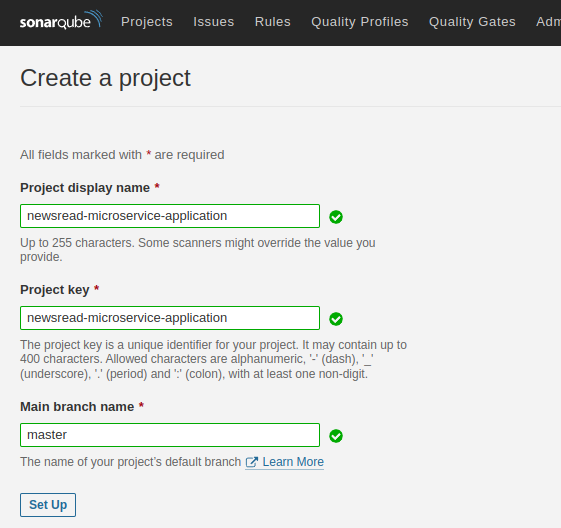
Follow the directions in the image above, then click on "set up".
NB: Your project key has to exactly be newsread-microservices-application. That way, you won't have to edit the Jenkinsfile.
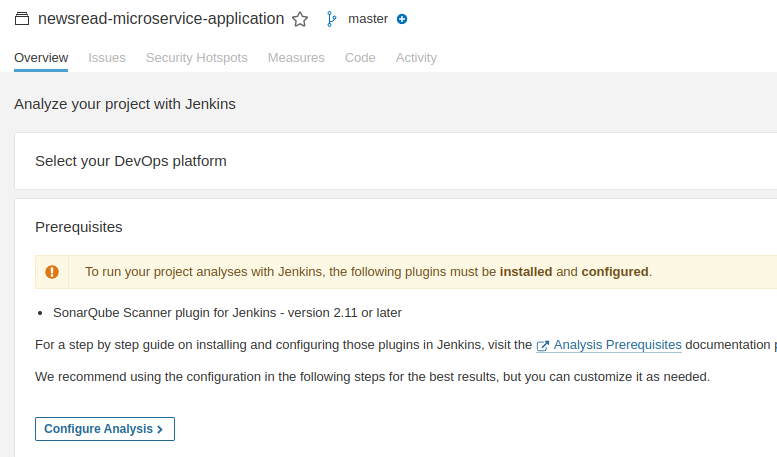
Select "With Jenkins" and choose GitHub as the DevOps platform.
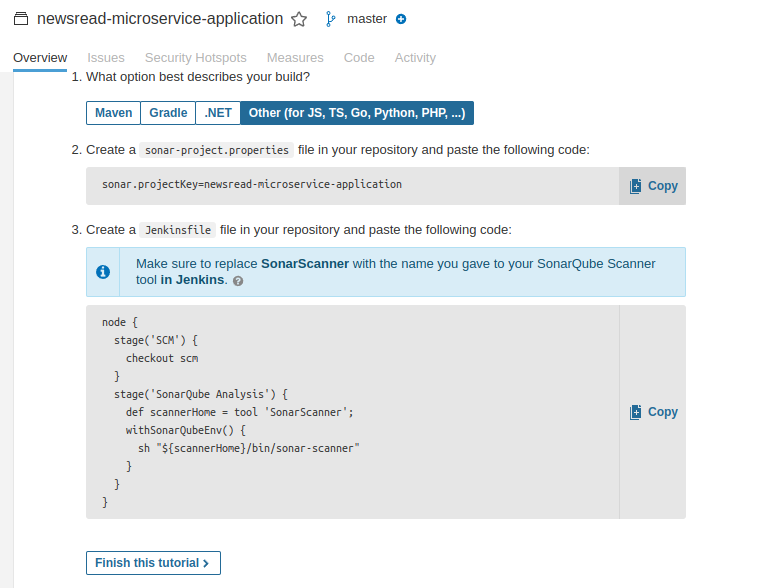
Click on Configure analysis, on step 3, copy the "sonar.projectKey", you will be needing it later.
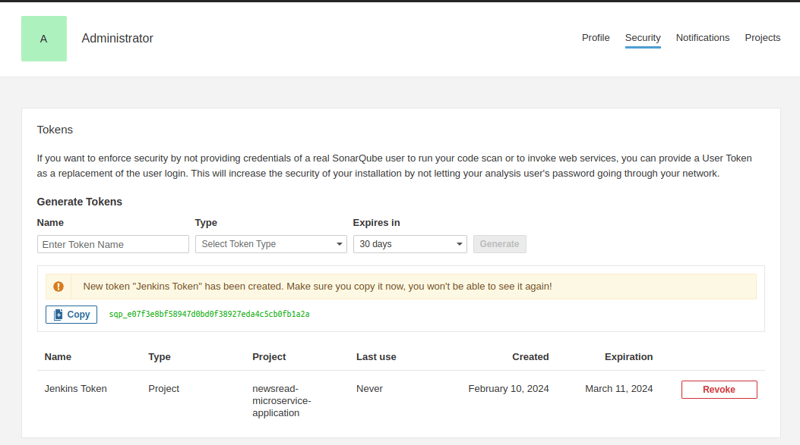
Click on "Account" > "My Account" > "Generate token". Give it a name and click on "generate".
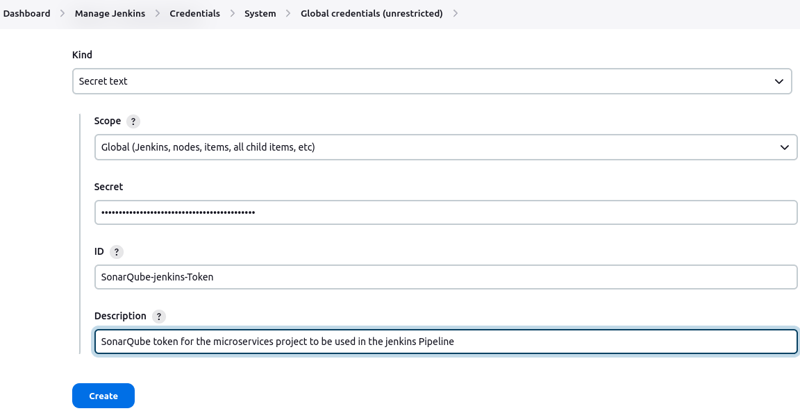
Go to "Manage Jenkins" > "Credentials"
Select secret tex and paste in the token you just copied.
Now go to Jenkins Dashboard > Configure Jenkins > System > Sonarqube Server > Add Sonarqube
Give it the name "SonarQube Server", enter the server url and credential ID for the secret token. Notice here that our server url is localhost, since SonarQube is hosted on the same server as jenkins.
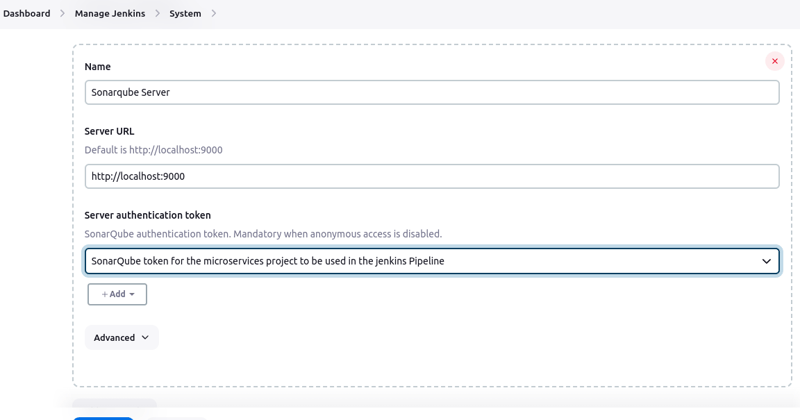
click on "Save".
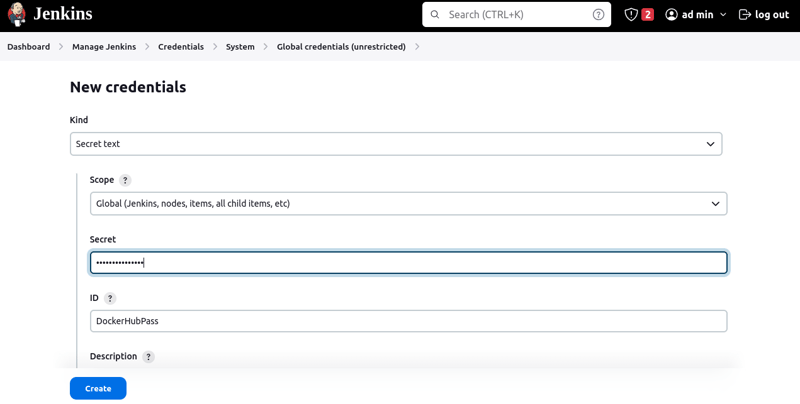
- Step 5: Integrate your DockerHub Credentials
This stage is essential for Jenkins to have access to your DockerHub account.
Go to "Manage Jenkins" > "Credentials" > "Add Credentials"
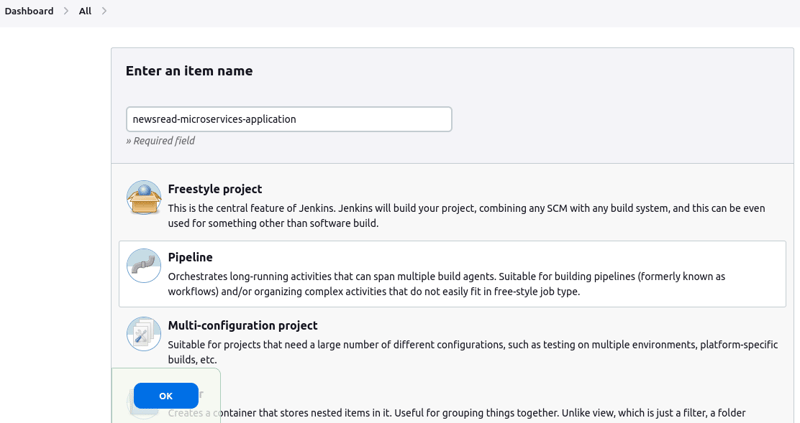
- Step 6: Configure The Jenkins Pipeline
From Jenkins' dashboard, click New Item and create a Pipeline Job.
Under Build Triggers, choose Trigger builds remotely.

Set a secret token under the "Authentication Token" box. We will use it when creating a GitHub Webhook.
Under Pipeline, make sure the parameters are set as follows:
Definition: Pipeline script from SCM
SCM: Configure your SCM. Make sure to only build your main branch. For example, if your main branch is called "main", put "*/main" under Branches to build.
Script Path: Jenkinsfile

NB You have to fork my repository into your own GitHub account. This is necessary for you to have acess to repository and able to configure it.
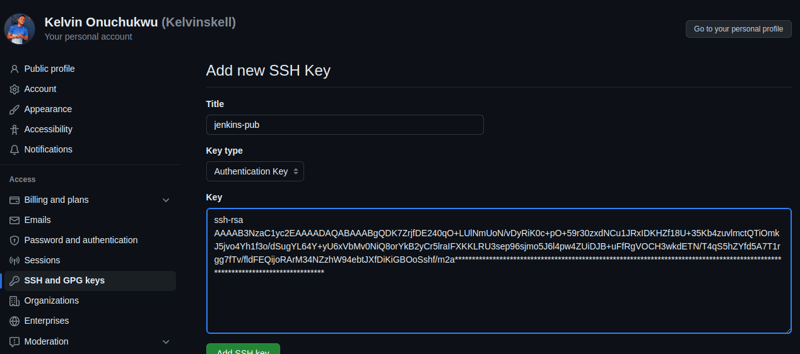
Once this has been done, create a GitHub Personal Access Token.
We will use the GitHub PAT to authenticate to our repository from Jenkins.
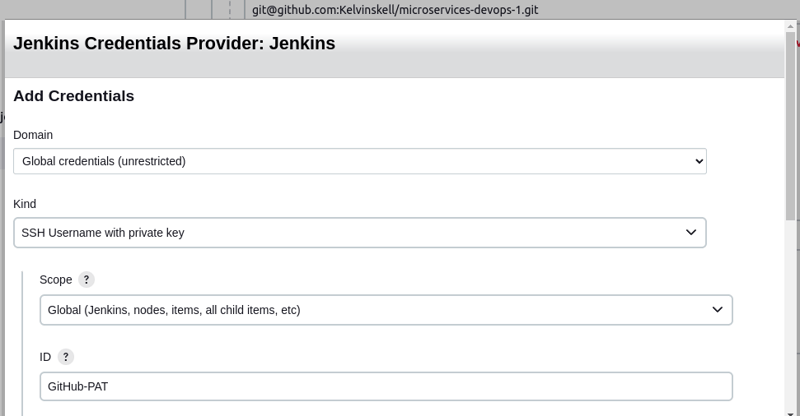
Connect to the EC2 instance, switch to the jenkins user, create an SSH key-pair. The public key will be uploaded to GitHub as your PAT, while the private key will be added in our Jenkins configuration.
Back on the Jenkins server, click on "Add credential"
The error message has now disappeared.
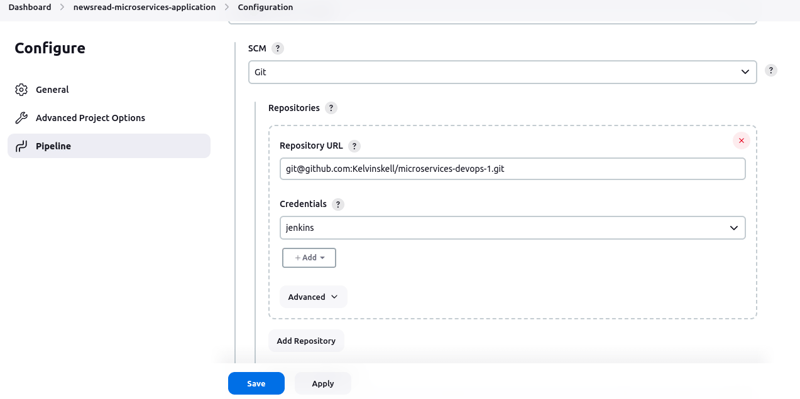
Click on "Save".
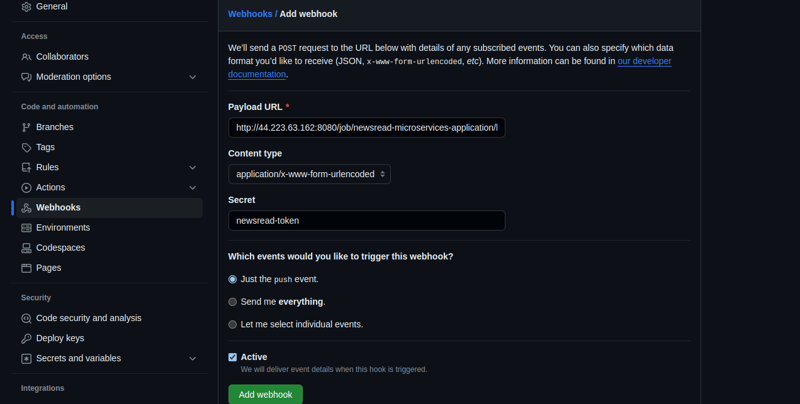
- Step 7: Create A GitHub WebHook
This is necessary for trigerring our jenkins builds remotely.
Go to the GitHub Webhook creation page for your repository and enter the following information: URL: Enter the following URL, replacing the values between *** as needed:
***JENKINS_SERVER_URL***/job/***JENKINS_JOB_NAME***/build?token=***JENKINS_BUILD_TRIGGER_TOKEN***
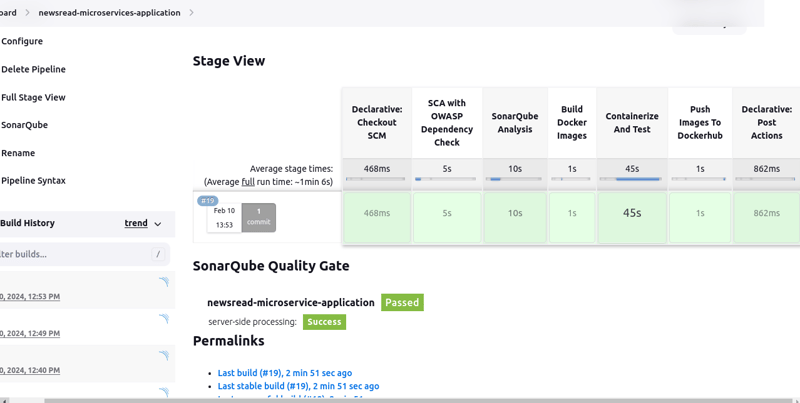
- Step 8: Execute The Pipeline
Now, we are done configuring this pipeline. It is time to test our work.
You can either trigger the pipeline by making a change and pushing to your GitHub repository. If the web hook trigger is properly configured, this will automatically start the pipeline.
Alternatively, you can simply click on "Build now" to execute the pipeline.
If everything is configured as they should, you will get this output:
Conclusion
We have now come to the end of the first part of this project. In this first part, we configured and set up the continuous integration pipeline. The second part will involve implementing GitOps using ArgoCD.
We will provision an EKS cluster using terraform, then use ArgoCD for contuinuous deployment to the EKS Cluster.
The idea here is that you can have seperate teams managing the two parts of the process - continuous integration and continuous deployment. Thus further decoupling and streamlining the whole process while using Git as our single source of truth.
Did you like this post?
If you did, please buy me coffee 😊